Showing posts with label chocolate. Show all posts

Friday, September 10, 2021

3 Minute Microwave Chocolate Slice

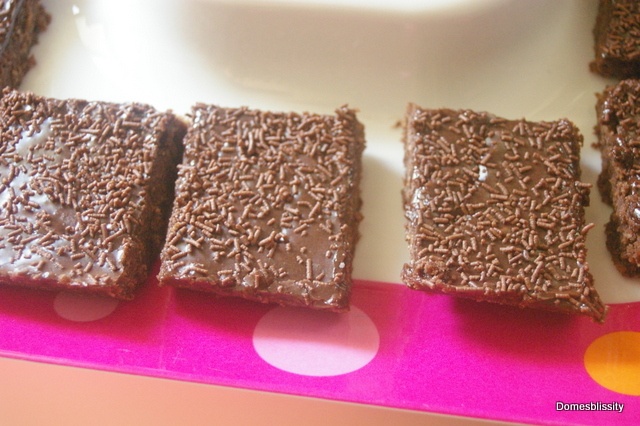
I can remember my good friend Claire telling me about a microwave slice recipe and I was positive I kept a copy of it but couldn’t find it anywhere especially when I had company coming for afternoon tea and I needed something to feed the kids. I did a quick Google search and found this one on Best Recipes.

3 minute microwave chocolate slice

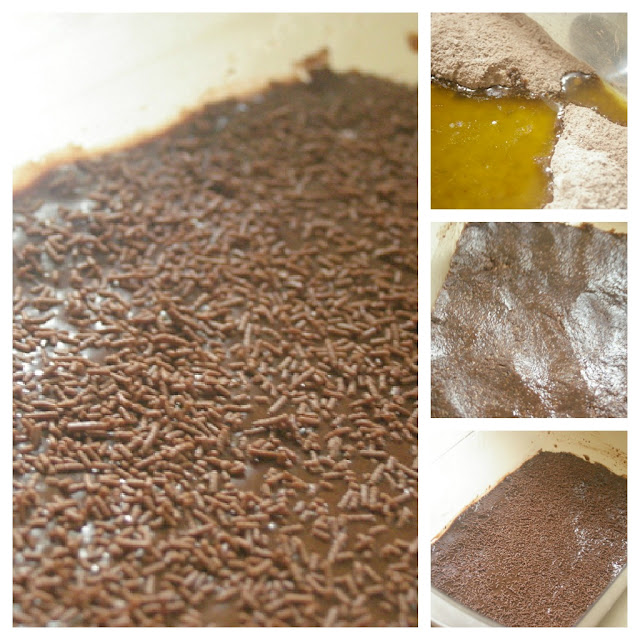
I can see this recipe being one of my favourites. Mix it all up in a dish suitable for the microwave, press down, cook for 3 minutes, allow to cool, ice and serve. I’ll add some nuts, use different flavoured icings and sprinkles, omit the cocoa, add sultanas, choc chips, dried fruit, you name it.

3 minute microwave chocolate slice

This is the perfect recipe for the busy Mum or for the kids to make up. (Just be careful when it comes out of the microwave as its very hot.)

3 minute microwave chocolate slice

3 Minute Microwave Chocolate Slice
(from www.bestrecipes.com.au)

  • 1 cup self raising flour
  • 1 cup coconut
  • 1/2 cup sugar
  • 1/4 cup cocoa
  • 2 tbs golden syrup
  • 150g butter, melted
  1. Mix all ingredients together in a microwave dish that will double as the slice dish. No need to grease the dish.
  2. Cook on medium high for 3 minutes. (I had an 1100w microwave and cooked mine for 2 minutes 30 seconds and checked then I cooked for a further 30 seconds.)
  3. Allow to cool slightly and ice with a simple icing of icing sugar, cocoa and milk. Top with sprinkles if desired.

Variations:

  • Omit cocoa
  • Add sultanas, nuts, dried fruit, chocolate chips
  • Serve uniced or with a drizzle of melted chocolate

Sunday, July 2, 2017

30 sec Self Saucing Chocolate Pudding in a Mug

When my 6 year old son asks “what’s for dessert Mummy?” and we’ve just had a roast chicken dinner, who am I to just give him plain vanilla ice cream for dessert? Right? That would just be cruel. I had to satiate this poor little guy’s appetite with a nice tummy warming pudding but couldn’t be bothered mixing and baking a full size pudding. (And besides, I would just eat the bloomin’ lot!)

30 Second Self Saucing Chocolate Pudding in a Mug www.domesblissity.com

You’ve all seen the recipe for the chocolate cake in a mug? Well, this is an actual self saucing pudding. A quick search and I found a recipe for this 30 second pudding in a mug. I’m not sure if its a help or a hindrance. I certainly don’t need to know any 30 second recipes for rich chocolate gooeyness. But as a public service, I’m here to share it with you, my lovely readers. You’re welcome!

I used your regular sized coffee mug to allow for mixing and spluttering in the microwave. Its so, so easy. Just a matter of spooning in flour, cocoa, sugar and milk. Topping with a sprinkling of cocoa and brown sugar and then some hot water. Zap in the microwave for 30 seconds (although mine needed 40 seconds) and tip out into a bowl. The sauce is sitting at the bottom of the cup.

As you can see in the top photo, I served my son’s in a bowl with a few banana chips. Me? I couldn’t wait. I just spooned ice cream into the mug. Your dessert dilemma is sorted.

30 second Self Saucing Chocolate Pudding in a Mug
(adapted by recipe found here)

  • 1 heaped tablespoon self raising flour
  • 1 heaped tablespoon cocoa
  • 1 heaped tablespoon sugar
  • 1 and a half tablespoons milk

Topping:

  • 1/2 tablespoon cocoa
  • 1 tablespoon brown sugar
  • 1 tablespoon hot water
  1. Mix together self raising flour, cocoa, sugar and milk in a coffee mug (or other small microwave proof jug).
  2. Sprinkle on top extra cocoa and brown sugar and carefully pour on hot water.
  3. Cook in microwave for 30 seconds. (Mixture should be combined and cooked. If undissolved cocoa exists, zap for an extra 10 seconds.)
  4. Pour into a bowl or add ice cream or cream to the cup.

If you like easy to make sweet treats that only use basic pantry ingredients and are made without using thermometers or complex steps, check out my Best & Easiest Homemade Sweets ebook. You’ll find easy fudge recipes that only require melting a bit of butter in the microwave or no cooking involved at all.

Friday, March 17, 2017

Easy Microwave Chocolate Fudge


There’s nothing quite like homemade fudge for a sweet treat and as much as I love traditional fudge made with sugar, cocoa and boiled on the stove top, this easy microwave chocolate fudge is quick, rich and hits the spot when you’re in a hurry.

Domesblissity.com: Easy Microwave chocolate Fudge

I don’t ever buy special ingredients when making sweet treats or baking but rather use what I have. I nearly always have chocolate melts or a block of chocolate in my pantry to add to baking. I always have a tin of condensed milk in my pantry which can be used for so many things and with the addition of a small bag of marshmallows that I had used for something else, this fudge came out really good.

Domesblissity.com: Easy Microwave Chocolate Fudge

First start by emptying the can of condensed milk, 60gm butter (approx 3 tablespoons) and a block of your favourite chocolate, broken up, into a microwave safe mixing bowl.

Domesblissity.com: Easy Microwave Chocolate Fudge

All microwaves are different so test by melting ingredients together, on high, in 30 second increments. Once chocolate has melted, stir ingredients well to combine.

Domesblissity.com: Easy Microwave chocolate fudge

Line a 9 inch square baking pan with baking paper. I sprinkled the marshmallows onto the bottom of the pan. If I would’ve added them to the melted chocolate fudge mixture they would’ve melted. Pour melted fudge mixture into pan and allow to set in fridge for at least 2 hours.

Domesblissity.com: Easy Microwave chocolate fudge

This batch of fudge was destined to be a ‘Rocky Road’ version with the addition of peanuts but because my daughter doesn’t eat peanuts, I didn’t add them. There are so many variations to this basic recipe you could try. You could try flavoured chocolate, white chocolate, add chopped cookies for a “Cookies & Cream” fudge, nuts, dried fruit etc. Really anything you have in your pantry that needs using up.

Recipe

  • 200gm block of chocolate or chocolate buttons
  • 1 can condensed milk
  • 60gm (or 3 tablespoons) butter
  1. Line 9 inch baking pan with baking pan.
  2. Combine all ingredients in a microwave save bowl.
  3. Microwave on high in 30 second increments until chocolate is melted.
  4. Mix melted ingredients together and pour into lined baking pan.
  5. Allow to set in the fridge for approximately 2 hours.

Variations:

  • Use white chocolate
  • Use flavoured chocolate, eg peppermint, rum’n’raisin, caramel, etc
  • Add nuts and marshmallow for ‘Rocky Road’
  • Add nuts of any kind
  • Add dried fruit
  • Add chopped cookies
  • Add coconut
  • Top fudge with ingredients you used in fudge, eg cookie crumbs for a Cookies & Cream fudge
  • Add chopped candy

You’ll find more great recipes for easy sweet treats right here.

Domesblissity.com: Easy Microwave Chocolate Fudge

Wednesday, September 7, 2016

Mint Chocolate Cream Cookie Brownies

domesblissity mint chocolate cream cookie brownies

Mint and chocolate, a match made in heaven as was the case with these Mint Chocolate Cream Cookie Brownies I made recently. My rich chocolate cake recipe, baked as a brownie and flavoured with mint chocolate coffee and chopped mint chocolate cream cookies. There was only a few cookies left and it was either trying to share them out fairly or chop them up and use them in these brownies so there was more to go around. The brownies won on all counts.

20160704_140114

I was sent these samples of Beanies flavoured coffee. My favourite was the Cinder Toffee. A really rich, cafe style instant coffee but the Mint Chocolate one, as well as being delicious to drink on it’s own, is perfect for flavouring a chocolate cake. Coffee naturally enhances the flavour of chocolate so this is a perfect blend.

20160704_140243

This cake mix is my favourite chocolate “crazy” cake recipe that I use for all cakes like round cakes, cupcakes, loaves and brownies. If baked in a slice pan, they turn out like a rich, fudgey brownie. Start by mixing 2 tablespoons of Mint Chocolate coffee into 1 cup of hot water.

20160704_140605

Like I said earlier, we had a few of these mint chocolate cream cookies left and there wasn’t going to be enough to go around. (I could’ve hidden them from the kids but they were onto me this time.) I thought by roughly chopping them and adding them to the brownies would add more richness and a nice crunch which it did. There was definitely more of everything to go around too so no arguments.

20160704_140247

Mix up the dry ingredients and add the coffee liquid and other wet ingredients. 

20160704_140809

The add the chopped mint cream cookies.

20160704_152507

Bake for approximately 25 minutes and once cooled, top with chocolate ganache.

20160706_150220

A rich fudgey brownie with the additional crunch of mint cream cookies. These were so good and so full of mint chocolate flavour. This recipe doesn’t contain any dairy or eggs (other than what’s in the ready made cookies) so it can be made in a hurry with basic pantry staples. A quick way to makeover a basic chocolate cake recipe by adding chopped leftover cookies (if that’s even such a thing). A piece of this brownie with a cup of Beanies Mint Chocolate flavoured coffee was the perfect combination.

Recipe

  • 1 1/2 cups plain flour
  • 1/2 cup sugar
  • 3 tablespoons cocoa
  • 2 tablespoons mint chocolate flavoured coffee (or 1 tsp peppermint flavoured essence)
  • chopped mint chocolate cream cookies (eg Arnotts “Mint Slice”)
  • 1 cup boiling hot water
  • 1 tsp bicarbonate of soda
  • 6 tablespoons of oil (I use vegetable or canola oil)
  • 1 tablespoon of white vinegar
  • 1/2 teaspoon salt
  • dark chocolate and cream for ganache topping (optional)
  1. Mix together flour, sugar, cocoa, bicarb soda and salt.
  2. Add coffee (or peppermint essence) to cup of hot water.
  3. Add white vinegar and add to dry ingredients.
  4. Stir through chopped cookies.
  5. Mix well.
  6. Pour mixture into a 20x25cm slice pan lined with baking paper and bake in a 170 deg C oven for approximately 25 minutes or until a skewer inserted comes out clean.
  7. Allow to cool and top with chocolate ganache (equal quantities of dark chocolate and cream).


Disclaimer:  I was sent samples of Beanies flavoured instant coffee to try. All photos, thoughts and opinions are my own. This isn’t a sponsored post.


mint-chocolate-cream-cookie-brownies


Monday, August 29, 2016

Almond Roca (Toffee Almond) Fudge

Almond Roca(Toffee Almond)Fudge

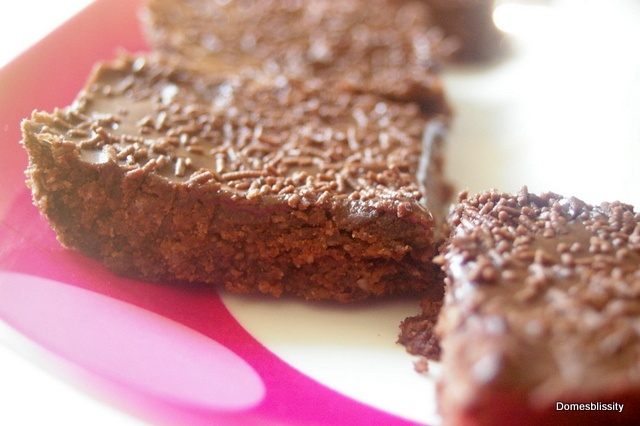
The poor teachers at my children’s school were left in charge of my 9 year old son when he went on camp just recently and besides probably needing a stiff drink by the time they got back, I wanted to give them a little something for ‘looking after’ my son. Fudge is always an easy and delicious thing to make as a gift so I decided to turn the usual ingredients for Caramel Fudge into something a little special with this Almond Roca Toffee Almond Fudge.

Domesblissity Almond Roca Toffee Almond Fudge

If you’ve never tried Almond Roca before, it’s a crunchy toffee candy filled with roasted almonds and then smothered in chocolate and coated in more finely chopped roasted almonds. I didn’t want to bother with boiling sugar so made my easy caramel fudge recipe but took both the butter and the caramelising of the fudge mixture that bit further to get a darker more toffee flavoured fudge and it worked beautiful. The same taste as Almond Roca but with a fudge texture.

20160724_112502

Get your pan ready by lining with baking paper.

20160724_113040

Get all your ingredients ready. For the fudge, I used a can of condensed milk, brown sugar, white chocolate melts, butter and finely chopped roasted almonds.

20160724_113330

Melt the butter and brown sugar but take the butter a little further until it is a golden brown colour.

20160724_114511

Add the condensed milk and keep stirring until it has gone a dark brown colour. Don’t leave the stove for a second or else it will burn. It will need to be stirred continuously for about 10 minutes. You’ll know when it’s ready if you pop a bit of the mixture into a glass of water and it forms a ball. Be sure to get around all the edges of the saucepan or else parts will be darker than others. Add the white chocolate melts and chopped roasted almonds.

20160724_114719

Pour into the baking pan lined with paper and allow to set. This should take an hour or so in the fridge. Leave overnight to be sure (but seriously, who can wait that long?)

20160724_123129

Melt some milk or dark chocolate in the microwave and chop some more roasted almonds.

20160724_123359

Pour the chocolate on top and sprinkle over the almonds. Press the almonds into the melted chocolate to they stay put. Allow for the chocolate to set.

20160724_123405

And there you have it. This takes an ordinary caramel fudge to a new level. You could try it with any kind of nut like macadamia, pecan, walnuts, brazil or even peanuts.

IMG_20160725_134958

I wrapped a couple pieces of fudge in cling film and popped them into these really cute pillow boxes. There are so many free printables for pillow boxes online but I found this one I really liked and you can download it for free here. The teachers were very happy with their little gift and assured me that my son was very well behaved (except for the time when he first got there and he was extremely home sick and ran and sat in a garden bed and the other time he decided he didn’t want to be any part of a game where his face was squirted with water).

20160725_131559

Almond Roca (Toffee Almond) Fudge

If you like the world famous Almond Roca candy you'll love this easy peasy fudge version. No need to work with hot sugar and worry about temperatures. This fudge is made in just under 30 minutes.
Author Anne

Ingredients

Fudge

  • 1 cup brown sugar
  • 1/2 cup butter
  • 395 gm can condensed milk
  • 1 cup white chocolate melts or chopped
  • 1/2 cup dry roasted almonds finely chopped

Topping

  • 1 cup milk or dark chocolate melted
  • 1/2 cup dry roasted almonds finely chopped

Instructions

  1. In a heavy based saucepan, melt the butter and brown sugar.
  2. Melt the butter until it has gone a dark, golden colour.
  3. Add the condensed milk and stir for approximately 10 minutes.
  4. Be sure to stir in the edges of the saucepan and don't take your eyes off it.
  5. Continue to stir until the mixture has turned dark brown in colour and if a bit of mixture is put into a glass of water, a firm ball is formed.
  6. Add white chocolate and 1/2 cup chopped almonds.
  7. Pour into a 9"x9" baking pan lined with baking paper.
  8. Allow to cool in the fridge for approximately an hour or overnight.

Topping

  1. Melt chocolate and spread over fudge.
  2. Sprinkle with 1/2 cup of chopped almonds.
  3. Allow chocolate to set in the fridge.
  4. Chop into pieces and serve.

Recipe Notes

Please note, this fudge will be a bit harder to cut than regular soft fudge.
Any nuts can be used to replace the almonds.

 Domesblissity Almond Roca Toffee Almond Fudge

Monday, July 11, 2016

DIY Hot Chocolate on a Stick

diy-hot-chocolate-on-stick

I went on a craft retreat back a few weeks ago and I wanted to give a little something to the attendees. I could’ve done something a little ‘crafty’ but because I like to cook, I wanted to give a food gift so decided on these DIY Hot Chocolate on a Stick. Being winter here in Australia I thought it would be the perfect something to stir through hot milk on those cold winter nights.

20160601_110453

These are really easy to make and perfect for making a large number of gifts for Christmas, Easter or any time of the year. I picked up these wooden spoons from the dollar store, 20 for $2.

20160601_111302

I remembered I had some washi tape that resembled a tape measure so I taped that to the edge of the wooden spoon.

20160601_114750

You can use an ice cube tray to set the hot chocolate mix or line a mini muffin tin, like I did, with plastic wrap. They’re easy to get out that way.

20160601_115050

Melt the chocolate and then add cocoa and icing sugar (powdered sugar). 

20160601_120352

Alternatively, you could supply a packet mix of hot chocolate and just make moulds of melted chocolate. If I make this again, that’s what I’ll do. Once you mix the dry ingredients to the chocolate, it goes quite stiff and is hard to push the marshmallows in.

20160601_121036

Using a small ice cream scoop or a spoon, spoon mixture into mould.

20160601_122709

Then just push the mini marshmallows and the wooden spoon into the mixture and allow to set. Once set, wrap in a little plastic wrap and gift wrap as required.

20160601_162513

I found these cute little gift tags from the dollar store and I just wrote the instructions on the back of the tag. These are a really quick, easy gift and I’ve thoroughly enjoyed the leftovers. To make the hot chocolate, you just need to stir the spoon through hot milk until it is melted. The marshmallows will also melt so you might like to add more.

Recipe

DIY Hot Chocolate on a Stick

An easy gift to make for a crowd, this delicious mix of cocoa, icing sugar and melted chocolate forms an instant rich hot chocolate drink.
Prep Time 30 minutes
Cook Time 15 minutes
Total Time 45 minutes
Servings 20
Author Anne

Ingredients

  • 400 gm chocolate milk or dark
  • 80 gm cocoa
  • 160 gm icing sugar
  • mini marshmallows
  • 20 wooden spoons

Instructions

  1. Melt the chocolate in 30 second bursts in the microwave until melted.
  2. Add cocoa and icing sugar and mix well.
  3. Put spoonfuls into a mini muffin tin or ice cube trays lined with plastic wrap.
  4. Push in mini marshmallows and wooden spoon or paddle pop stick.
  5. Allow to set.

Recipe Notes

Adapted from Strudel & Cream


DIY-hot-chocolate-on-stick-pin

Monday, June 13, 2016

Chocolate Hazelnut Truffles

Chocolate Hazelnut

Do you ever make a recipe and not until it’s baked do you realise you’ve missed an ingredient? Yeah, me neither! Oh, I do it all the time lately. I think I’m pretty smart and remember the recipe off by heart by I’m not really that smart at the end of the day. Must be old age creeping in I think. I’m reminded all the time that I should always refer to the recipe and not second guess. That’s how these Chocolate Hazelnut Truffles came about. By accident.

20160512_143630

I make this ‘crazy’ cake recipe ALL the time and I mean all the time. This particular time I made a banana cake but forgot the sugar! Like seriously! Anyway, it tasted kind of okay but just wasn’t as good as it should’ve been but I couldn’t waste it. I wanted to turn it into truffles and I nearly always have Nutella in the pantry and I had hazelnuts as well so that’s what I decided on turning this sugar-less cake into.

20160512_143828

Break up the cake into chunks and blitz until fine crumbs form.

20160512_144904

Add the flavouring of your choice. I had added chopped and ground hazelnuts, 1/4 cup cocoa and about 1/2 cup of Nutella. You’ll find, as you’re mixing it, whether it needs to be more dry or more http://www.homedatingnetwork.com/member/blog_post_view.php?postId=278613 wet. I’d rather add less ‘wet’ ingredients from the start, like the Nutella, so you’re not left with a really wet mixture and it’s hard to form into balls.

20160512_145113

The mixture should be the same consistency as a meatball, I guess which will allow you to form quite firm balls. Using an ice cream scoop or just a spoon, scoop mixture into your hand and form into a ‘ball’ shape.

20160512_145545

Set on a tray and refrigerate until firm, approximately 30 minutes.

20160512_152416

You can eat them like that or dip them completely in melted chocolate or just drizzle a little chocolate on top, which is what I did. You don’t need to use too much chocolate that way.

20160512_152423

I find the messier the better. Return to the refrigerator until chocolate has set.

20160512_152655

And that’s it. You can do this with any cake, store bought or home made. If your cake is starting to get a little stale, this recipe is perfect. You can add any kind of nuts, dried fruit, nut spread, melted chocolate. Just remember, you’re aiming at getting the consistency of a meatball and you can have any flavoured truffle. It’s a great way to use up cake and they look a little fancy for a special occasion. They freeze well too.

20160512_154857

chocolate-hazelnut-truffles-pin

Chocolate Hazelnut Truffles

A delicious way to use up leftover cake (or a cake that hasn't gone quite to plan, as was the case with me) and turn it into something a little more decadent.
Prep Time 15 minutes
Total Time 15 minutes
Servings 18
Author Anne

Ingredients

  • cooked cake approximately 1 cake or adjust the other ingredients to the amount of cake you have left
  • 1/2 cup Nutella
  • 1/4 cup chopped hazelnuts
  • 1/4 cup ground hazelnuts optional
  • 1/4 cup cocoa
  • chocolate melted (for drizzling or dipping truffle into)

Instructions

  1. Blitz cake until fine crumbs are formed.
  2. Add cocoa, Nutella, chopped and ground hazelnuts and mix well.
  3. Mixture should be the same consistency as if you were making meat balls.
  4. Using a small ice cream scoop or spoon, take mixture and roll between hands until a ball shape is formed.
  5. Set on a tray lined with baking paper and put in the refrigerator for 30 minutes.
  6. Melt chocolate by breaking up into pieces and put in the microwave for 30 second increments until melted.
  7. Using a fork, take chocolate and 'drizzle' onto truffles.
  8. Return to the refrigerator until chocolate has set.
  9. Suitable to freeze.

Recipe Notes

Any kind of cake can be used.
I used a banana cake for this recipe.
Any ingredients can be used, eg dried fruit, chopped candy bars, nuts and a binding ingredient like nut pastes or melted chocolate.