Showing posts with label lime. Show all posts

Thursday, June 13, 2013

Lime & Coconut Chicken

I wish I had a dollar for every time I pinned a chicken recipe to my Food board in Pinterest. I’d be rich. In fact, I’d probably be about $798 richer because that’s how many chicken recipes I think I’ve pinned over the years. But why is it, when I pull out the chicken from the fridge, I’m bamboozled by what to do with it?

I had a browse on Pinterest the other day and two recipes popped out at me, Lime & Coconut Chicken and Spicy Paprika and Lime Chicken.  I put the vote out to my Facebook fans and the Lime and Coconut Chicken won out on the night. I was glad too because it was delicious and super easy to throw together. It was like all the flavours of Thai chicken without it being an actual Thai dish.

I didn’t follow the ingredients to a tee. The recipe called for curry powder and believe it or not, I didn’t have any in the pantry. I must’ve run out some http://radicore.org/fud/index.php?t=usrinfo&id=4352& time ago and not bought a replacement. What Aussie pantry doesn’t have a tin of Keen’s in it?

Lime & Coconut Chicken
(based on this recipe)


  • 4 chicken tenderloins
  • oil spray
  • zest of lime
  • 2 tsp ground cumin
  • 1 Tbs ground coriander
  • 2 Tbs soy sauce
  • 2 Tbs sugar
  • salt
  • 1/2 cup coconut milk
  • chilli, to taste
  • 1/2 cup chopped fresh coriander (or 2 tbs from a tube)
  • Fresh limes, cut into wedges

  1. In a bowl or zip lock bag mix all ingredients except the lime juice. 
  2. Add chicken and marinate in the refrigerator for up to two hours.
  3. Place the breasts on a grill (or in a pan – I did mine on the sandwich press which had been sprayed with a little oil spray) and cook, saving the marinade.  
  4. With the remaining marinade, pour into a small saucepan and bring to a rolling boil.  Boil for at least 2 minutes, stirring occasionally.  
  5. Squeeze lime juice over the chicken to serve.
  6. Serve with brown rice and vegetables and/or salad.

Serves 2.

    Monday, March 11, 2013

    Kiwifruit, Coconut & Lime Cakes

    I know what you’re all thinking. “Oh Anne had too many kiwifruit and they needed using up.” And you’d be right. I like to buy the large box. The kids like them and they are pretty nutritious but they get a bit tired of them day in, day out. I can remember a few years ago finding a recipe for Kiwifruit, Coconut & Lime Muffins which was a great flavour combination and they tasted really good. I don’t know about you but I’m a bit tired of muffins. Give me a cake any day. I don’t think there’s that much different but cakes, to me, are a lot more moist and soft.

    I didn’t want to reinvent the wheel with the recipe either and went for that stock standard coconut cake recipe. You know the one? One cup coconut, one cup self raising flour, one cup of sugar and one cup of milk. Its the easiest cake around and lovely and moist on the inside and crunchy on the outside.

    You can add just about anything to it and today I thought the grated zest of one lime and two chopped kiwifruit would just be perfect.

    This coconut cake recipe is best made in a loaf pan but I prefer to bake the cakes in a muffin pan or mini loaf pan. They freeze really well and there’s no cupcake paper to deal with for fumbling fingers at lunch time.

    These should keep the youngsters happy this week but heaven help the daughter if she finds a ‘green bit’ in her cake (even though she will eat kiwifruit). No harm in trying I suppose.

    Kiwifruit, Coconut & Lime Cakes


    • 1 cup coconut
    • 1 cup sugar
    • 1 cup self raising flour (1 cup plain flour and 2 tsp baking powder)
    • 1 cup milk (I used skim – like that’s going to make much of a difference)
    • 2 kiwifruit, peeled and diced
    • zest of one lime (don’t worry if you don’t have lime zest – lemon would do or just omit)
    1. Heat oven to 175 deg C (or 375 deg F).
    2. Prepare baking pans, either a Texas muffin pan greased or with cupcake papers or a loaf pan lined with baking paper.
    3. Combine coconut, sugar and flour.
    4. Add milk and mix well.
    5. Fold through chopped kiwifruit and lime zest.
    6. Spoon into muffin pan until 3/4 full.
    7. Bake for approx 25 mins or until golden brown.
    8. Allow to cook in tin before removing.
    9. Makes 12 Texas size muffin cakes.

    Sunday, January 20, 2013

    Blackened Fish Burger with Coriander Lime Mayo


    I do love a cooking challenge and when I saw Jutta from Hungry Little Girl was starting the New Year off with one, I decided to join up. By signing up, I am given a ‘secret’ blogger to stalk check out and cook one of their recipes and then blog about it with all recipes linking up over at the Hungry Little Girl web site on the 20th of each month. I can’t wait to find out who was allocated me and which of my recipes they cooked.

    Bobbi's Kozy Kitchen

    Anyway, my partner was Bobbi from Bobbi’s Kozy Kitchen. Bobbi has an amazing story. She was raised by a Mum who cooked ordinary meals and she didn’t really learn to cook anything too interesting herself. After having a gastric bypass operation she decided to try and learn to create fresh, healthy meals that relied upon natural ingredients and nothing from a packet or jar (my kind of girl).


    I had a fun time looking through all her recipes and I had about half a dozen I wanted to try. I originally had planned the Cheesy Poblano Chicken but its been so hot here in Queensland, I decided to have something that didn’t require too much effort or generate too much heat in the kitchen. (This one is on my saved list to try come winter time.)

     
    Bobbi recreates famous celebrity chef’s meals and this Blackened Tilapia Sandwich with Cilantro Lime Mayonnaise originally by Paula Dean was going to be just perfect for lunch. I made a couple changes because I didn’t have a few of the ingredients but it was just delicious. 
     
     
    I’m not really sure what type of fish tilapia is and if we can even get it here in Australia but I just used a frozen  basa fillet I had. I didn’t have onion or garlic powder either so substituted with fresh. I didn’t have a dry spice to cook the fish in but rather a wet mix which I spread on the fish

    while cooking. I was going to use Greek yoghurt instead of mayonnaise in the coriander mayo but already had it mixed before I remembered. This is definitely something I’ll cook again. It was really filling and delicious and a great meal for a warm day. I can’t wait to try some of Bobbi’s other recipes. It was great getting to know you Bobbi! What an inspiration you are.

     
    Blackened Fish Burger with Coriander Mayo
     
    • 1 white fish fillet
    • 1 bread roll (I used focaccia)
    • 2 tbs sweet paprika
    • 1 tbs ground thyme
    • 1 tsp finely diced onion
    • 1 tsp crushed garlic
    • 1/2 tsp salt
    • chilli to taste
    • olive oil for frying
    • salad greens
    • mango salsa (diced fresh mango and store bought Mexican tomato salsa)
    • 2 tbs mayonnaise
    • 1 tbs finely chopped coriander
    • 1 tsp lime juice


    1. Combine paprika, dried thyme, diced onion, crushed garlic, salt and chilli in a mortar and pestle (or blender) and grind to form a paste.
    2. Heat oil in pan and once hot, place fish fillet in pan and spread with spice paste. After 3 minutes, turn fish and repeat with remaining spice blend.
    3. Mix mayonnaise, coriander and lime.
    4. Toast bun and spread with coriander mayonnaise and add salad greens.
    5. Top with fish and mango salsa.
    Serves 1. Multiply quantities depending on number of people you are serving.
     
    Here’s a quick tip. When dicing mango, cut ‘cheeks’ of mango and slice horizontally and vertically into mango cheek while skin is still intact. Turn skin ‘inside out’ and remove flesh straight into a bowl. 


     I hope you go and check out Bobbi at Bobbi’s Kozy Kitchen. I’m off to go and follow her now. I didn’t want her to know I was stalking her! If you’d like to join up in the Surprise Recipe Swap, head on over to Hungry Little Girl and get on the list. I can’t wait to find out who I will be allocated in February. Thanks so much Jutta for organising this.


    HungryLittleGirl

    Tuesday, October 16, 2012

    Pineapple & Mint Cakes with Lime Drizzle

    You know me and those silly cravings I get. I had a craving to make a Hummingbird Cake a few weeks ago but that didn’t happen so I’ve had a can of crushed pineapple staring at me in the pantry every time I opened the door. No point making big cakes in our house anymore otherwise I just eat the lot. I bought myself a mini loaf pan and this pineapple recipe was perfect.

    Ideally, one of these ‘mini’ loaves might do two people but I ate the whole thing. It wasn’t that big, really. This recipe can be made in a normal sized loaf pan, a ring pan, round pan or cupcakes. You could also add lime zest to the icing for a bit of extra lime taste.

    Pineapple & Mint Cakes with Lime Drizzle

    • 1 1/2 half cups plain flour
    • 1 x 450g can crushed pineaple in natural juice
    • 1 cup sugar
    • 1 cup water
    • 1 tbs dried mint leaves (or 2 tbs Gourmet Garden mint)
    • 1 tablespoon white vinegar
    • 6 tablespoons oil (I use canola)
    • 1 teaspoon bicarb soda
    • half teaspoon salt
    • 1 cup icing sugar
    • enough lime juice to mix with icing sugar to form a honey-like consistency for Lime Drizzle
    1. Turn oven to 180 C (375 F). Grease or line baking tin well.
    2. Mix the flour, sugar, canned pineapple (including juice) and water in a bowl.
    3. Add mint, vinegar, oil, baking soda and salt. Mix well.
    4. Pour into the tin. Bake 20 to 25 minutes.
    5. Cool for 10 minutes then take out of tin.
    6. Drizzle with lime icing.


    Saturday, May 5, 2012

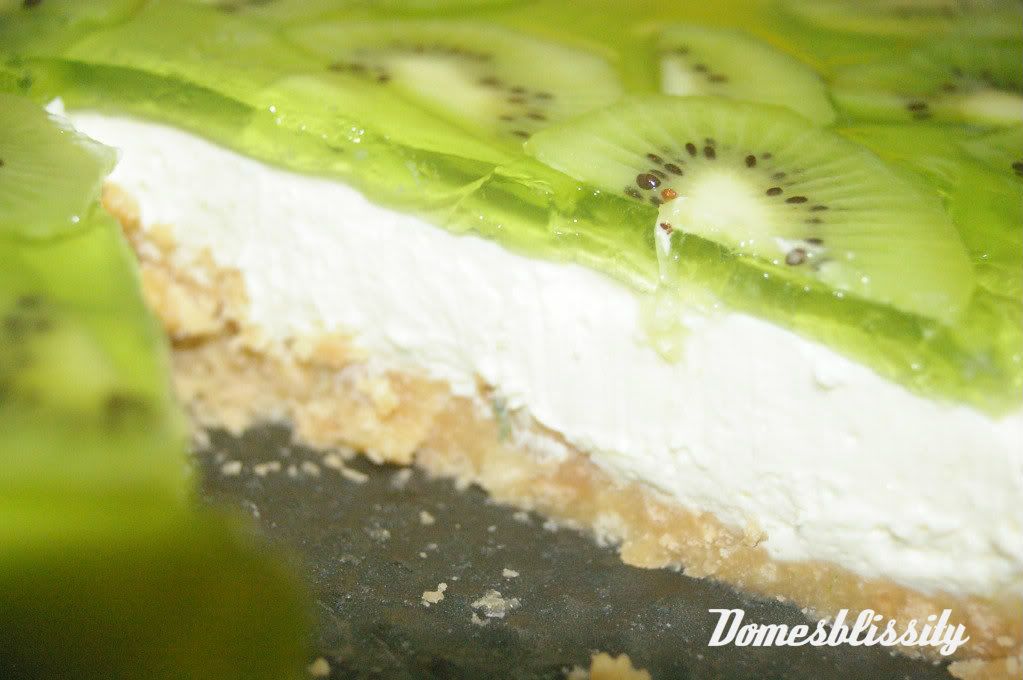
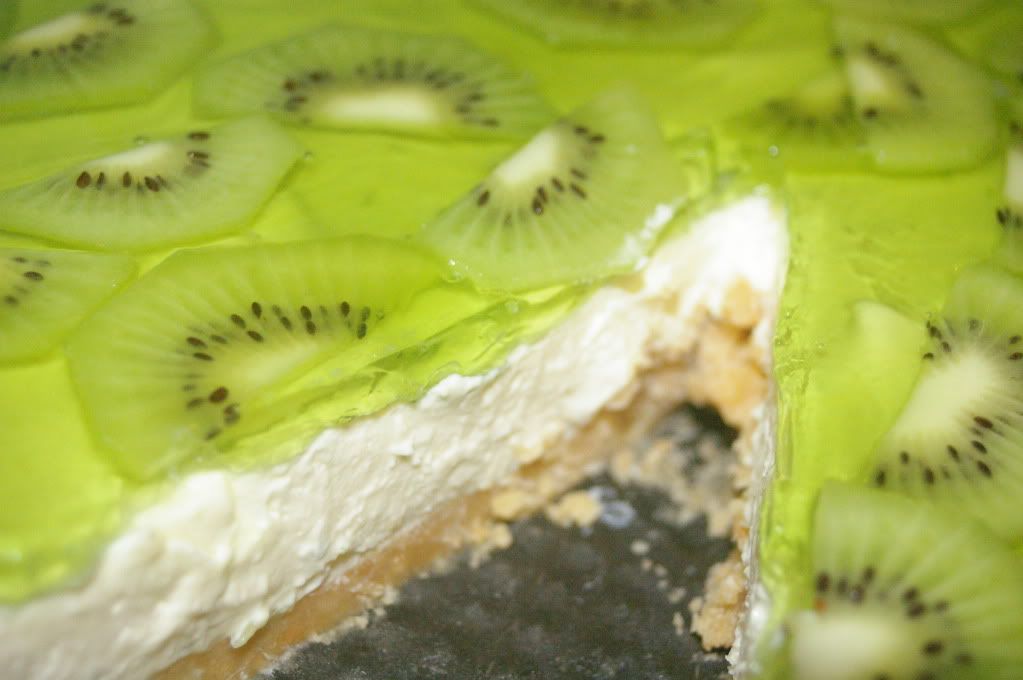
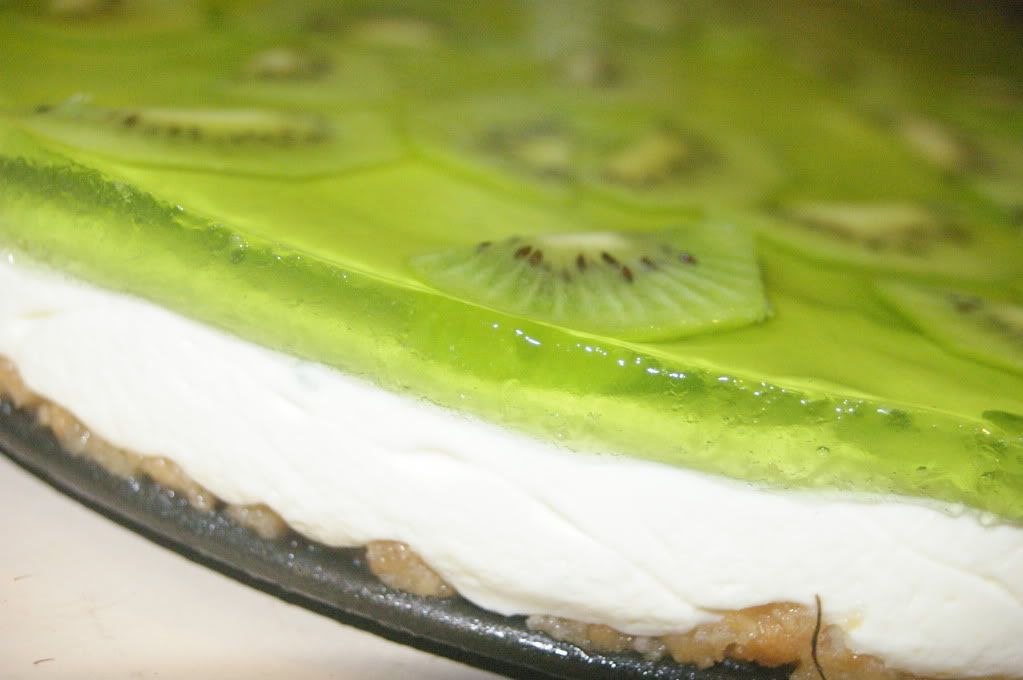
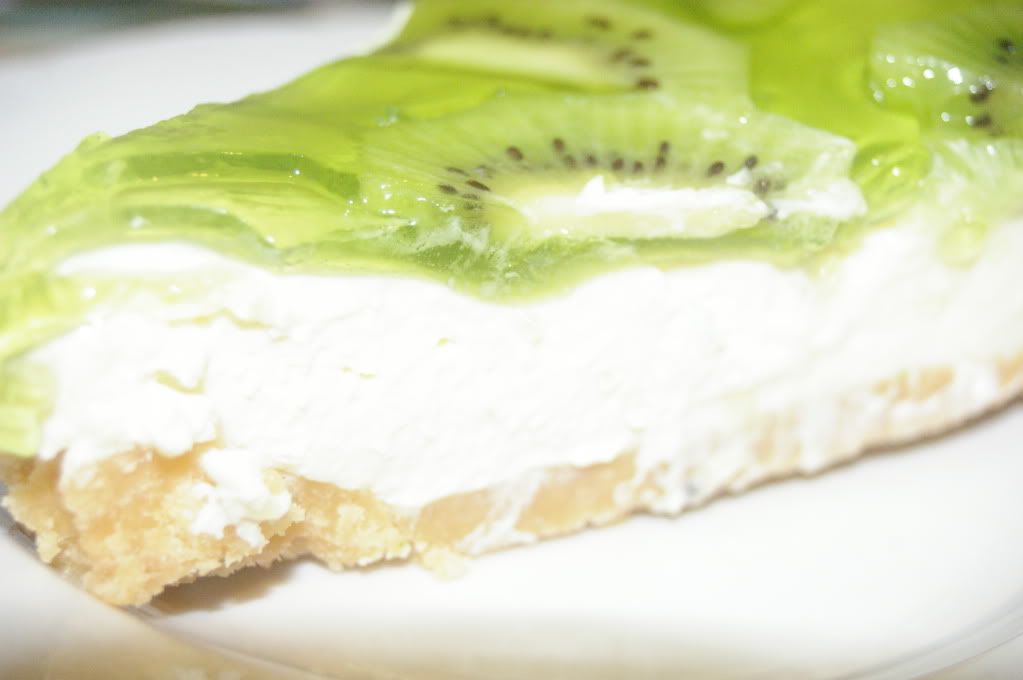
    No bake Kiwi & Lime Jelly Cheesecake

    One thing I don’t make a lot of is cheesecake. One, for the calorie content and two, well, I don’t really know. It’s not like cream cheese is regularly in my shopping trolley and I have been known to make a cheesecake from leftover ricotta, Greek yoghurt and whatever else has been left in the fridge. I find it a bit rich (which is rich coming from me because I love rich food).

    My son inherited his love for cheesecake from his father and my daughter is becoming more game and will happily devour a piece of plain homebrand frozen cheesecake from the supermarket. This was the extent of the cheesecake eating in this house. A $2.99 homebrand frozen cheesecake from the supermarket.

    When you start looking at cheesecake recipes, you could just go wild. Some are so rich with chocolate and/or fruit syrups, tangy and fruity using all sorts of tropical fruit, as I’ve done in this case. Topping the cheesecake with jelly adds another flavour and sets the fruit nicely. I placed the kiwifruit on oh so carefully on the cheesecake and when I slowly poured the jelly on, off they went. Floating all over the cheesecake.

    This photo looks a little abstract that’s just the way the kiwifruit settled

    Kiwi & Lime Jelly Cheesecake
    (based on the original no bake Philadelphia Cheesecake recipe)

    Base:
    1 packet shortbread finger biscuits
    125gm butter, melted

    Filling:
    500gm cream cheese, softened
    grated rind of 1 lime
    juice of 1 lime
    1/2 cup sugar
    3 tsp of gelatine, dissolved in 1/4 cup of hot water
    1 cup thickened cream, whipped to stiff peaks

    Topping:
    1 packet lime jelly crystals
    3-4 kiwifruit, peeled and thinly sliced

    1. Thoroughly grease a springform pan and set aside. (Alternatively, any pie dish can be used or for individual cheesecakes use cupcake papers in a cupcake or muffin pan.)
    2. Place biscuits in a plastic bag and hit with a rolling pin until crumbs form. (Alternatively, crush the biscuits in a food processor).
    3. Mix biscuit crumbs with melted butter into a springform tin and place in fridge until later.
    4. Beat cream cheese, juice and rind of lime and sugar until smooth.
    5. Gently beat in cooled gelatine mixture and thickened cream.
    6. Place on top of biscuit base and return to the fridge to set.
    7. Make up jelly as per packet instructions.
    8. Place cut kiwifruit slices on top of cheesecake and slowly pour cooled jelly over the top of the cheesecake and return to fridge to set.

    I found this a little rich and tangy with the lime zest and juice added. You could add a little more sugar or serve with extra cream. Not sure if I’m a big fan of cheesecake or not. Nice for a change I guess. I guess I also decided on this flavour combination because of what I had available. The only thing I had to buy was cream cheese and cream.

    And a reminder – we call Jell-o “jelly” here in Australia. What the US calls jelly, we call jam. We all know what we mean, don’t we?