Showing posts with label Renovation. Show all posts

Monday, October 8, 2018

Kitchen Ideas When Renovating to Help Get the Best Cooking Space

The cooking space is considered the heart of the kitchen. It is where you prepare and cook food for your family, relatives, and friends. Likewise, you will be comfortable and enjoy your cooking when you have the best cooking space. Here are some kitchen ideas when renovating to help get the best cooking space.
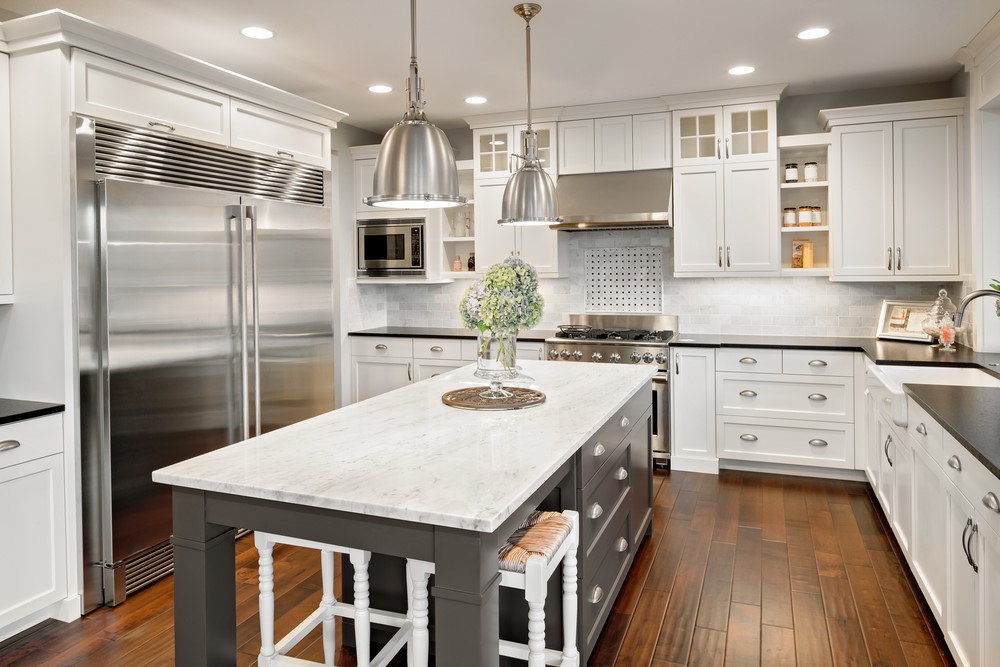
Kitchen Ideas When Renovating to Help Get the Best Cooking Space www.domesblissity.com

Image Source

If you want to renovate your kitchen, take into account the flow of your cooking space and at the same time the area you will allot for it. Here are some kitchen renovation ideas that could help you in coming up with the best cooking space.

Apply the “work triangle”

The “work triangle” is the good circulation flow of the three appliances you see in the kitchen. These include the refrigerator, the oven or hob, and the sink/dishwasher. In planning your kitchen, you must apply this “work triangle,” which is adequate for food preparation, cooking, washing, and storage. This layout makes cooking inside the kitchen easy as everything will be handy and in close proximity.

Opt for a U-shaped kitchen layout

A U-shaped kitchen layout follows the “work triangle.” In this layout, you can make the most of your kitchen. You have enough areas for preparation and cooking. The middle is left spacious, and you could move quickly and comfortably. A U-shaped kitchen layout is perfect for those who love to prepare and cook food every day. Moreover, you will have a lot of space for storage that will keep your kitchen organized and neat.

Build an island

If you have ample area in your kitchen, build an island, which is very helpful in multitasking. The island can be utilized for food preparation or eating breakfast. Some islands also have a built-in oven. You could also incorporate a second sink in the island, which makes your food preparation and cleaning up utensils easy and fast.
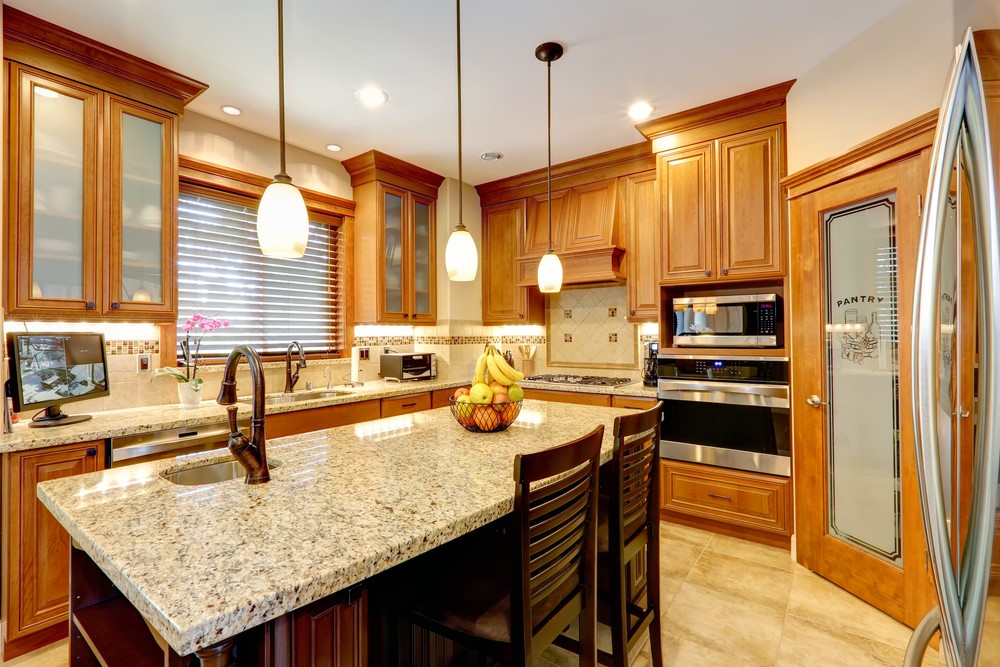
Kitchen Ideas When Renovating to Help Get the Best Cooking Space www.domesblissity.com

Image Source

Also, you could entertain your guests and eat on the island top. A marble island top is presentable for dining. You could have quality marble for your kitchen top at euromarble.com.au. They feature a wide selection of superior quality marbles that could make your kitchen island appealing and attractive.

Have an easy-to-maintain backsplash

The backsplash is the area that receives most of the grease from your oven and stove. To help keep your cooking area tidy, you must clean the backsplash always and remove the dirt and oil. It is advisable that you choose a backsplash that is not just aesthetically beautiful but also easy to clean.

Provide open shelves and hook rails

You can cook comfortably and fast if you have easy access to your cooking materials and condiments. You may build open shelves near the oven/hob to accommodate your spices and other cooking utensils.  Likewise, you may put hook rails on the walls near your oven, in which you could hang your pans and pots. In case you do not want to expose your pans and pots, use the lower cabinets near the oven.


The best cooking area in your kitchen will definitely inspire you to prepare and cook for your loved ones. Moreover, having a functional and appealing kitchen can make your house beautiful and increase its value.


Tuesday, October 6, 2015

Outdoor furniture makeover with hessian (burlap) cushions


One good thing about my new husband and I is that we love a bargain especially if it's free. He's right into recycling and making do like I am and if we see something put out on the side of the road, we'll grab it like the above 2 outdoor chairs.


We have a lot of little outdoor spaces that we like to sit at all year round so we had enough chairs but when I saw these 2 (2 of 6), I grabbed them. I didn't take the chair pads because they were in pretty poor condition and beyond saving.


We had major drainage works completed at the side of the house earlier this year and there was quite a mess left. Damien decided to make this little paved area reusing pavers we already had so we needed a couple of chairs so the finding the above two was perfect timing. This area down the side of the house is really warm and sunny in the morning so perfect for cold winter mornings and in complete shade by midday so perfect for hot summer days in the afternoon.


Damien gave the chairs a spray of black paint with paint we already had. Being a couple weeks out from the wedding, my first reaction was to go and buy some chair pads but I really couldn't justify the cost. My second choice was to buy some fade resistant fabric from the store and make some cushions but have you seen the price of that per metre? I wondered what I could use from my stash that would hold up to the weather. I was also wondering what I could use for the cushions and then I had a light bulb moment.


I have quite a few cushion inserts and pillows so I thought I could use them. They were exactly the same size as the chair but I thought I could disguise it by making the fabric a little bit bigger.


Then my brain went into overdrive and I remembered I had a few hessian (burlap) sacks in my stash for various crafts and they would be just perfect. When I measured the width and total length of the chair it was going to be a little bit short lengthwise and a little bit longer on the width. I didn't want to cut the hessian as it has a tendency to unravel so I just sewed in to fit. I also needed 20 centimetres of fabric because the hessian bag was just that little bit short and I really didn't have anything appropriate in my fabric stash until I remembered I had 1 black pillow case in the linen cupboard which probably wasn't going to be used for it's intended purpose and it worked out well for the extra 20 centemetres required for the length of the chair pad plus ties to tie it onto the chair.


After cutting the black fabric to size, sew onto the opening of the hessian sack which has been sewn in to fit the width of the chair.


Turn right side out ready for sewing ties on.


You'll need 6 ties per chair, two at the top, two at the middle and two at the front of the chair pad. Sew strips of black fabric and turn right side out. Insert open seam on ends into itself and sew to close.


Give the hessian sacks a bit of a press with a hot iron, ready for sewing the black ties onto.


I thought I'd get a little bit creative with the chair cushions and make a stencil with the word "CHILL" on it just for the sake of it. This was just typed up in Microsoft Word and using a Stanley knife cut out the letters.


Place on the hessian and mark out the letters with a permanent marker.


Colour in and finish with a full stop (which is just a circle). Make sure you have an old piece of card or paper underneath or the permanent marker will come through on the other side.


I toyed with the idea of making removable cushions but I just couldn't be bothered. I have quite a large washing machine so they would fit in there or a good scrub with a scrubbing brush and some soapy water would clean them with a rinse off with the hose. Once you've sewn the ties on in place, insert the chair seat cushion and sew into place.


Insert the cushion for the chair back and pin the top opening ready for sewing. It can be a little cumbersome with the cushions inserted but by taking my time and persevering, they worked out okay. It was a quick afternoon job and I didn't have to spend a cent. (Although technically I bought the hessian sacks some time ago, the black paint and cushion inserts, it's all about using what you've already got.)


So there you have it. Two outdoor chairs for our newly created outdoor space that didn't cost a thing. This space came in very handy on the wedding day because it was a great space to just 'chill out'.


They may not fit 100% or look professional like the store bought ones but they do the job and they're individual which is what I like. Next job is to paint the house and the fence. Slowly but surely we're getting through all the things on the to do list.

PS I must've been baking on this particular day and had greasy fingers which marked the camera lens.

Monday, October 5, 2015

Outdoor furniture makeover with hessian (burlap) cushions

One good thing about my new husband and I is that we love a bargain especially if it’s free. He’s right into recycling and making do like I am and if we see something put out on the side of the road, we’ll grab it like the above 2 outdoor chairs.

We have a lot of little outdoor spaces that we like to sit at all year round so we had enough chairs but when I saw these 2 (2 of 6), I grabbed them. I didn’t take the chair pads because they were in pretty poor condition and beyond saving.

We had major drainage works completed at the side of the house earlier this year and there was quite a mess left. Damien decided to make this little paved area reusing pavers we already had so we needed a couple of chairs so the finding the above two was perfect timing. This area down the side of the house is really warm and sunny in the morning so perfect for cold winter mornings and in complete shade by midday so perfect for hot summer days in the afternoon.

Outdoor Furniture Makeover

Damien gave the chairs a spray of black paint with paint we already had. Being a couple weeks out from the wedding, my first reaction was to go and buy some chair pads but I really couldn’t justify the cost. My second choice was to buy some fade resistant fabric from the store and make some cushions but have you seen the price of that per metre? I wondered what I could use from my stash that would hold up to the weather. I was also wondering what I could use for the cushions and then I had a light bulb moment.

I have quite a few cushion inserts and pillows so I thought I could use them. They were exactly the same size as the chair but I thought I could disguise it by making the fabric a little bit bigger.

Then my brain went into overdrive and I remembered I had a few hessian (burlap) sacks in my stash for various crafts and they would be just perfect. When I measured the width and total length of the chair it was going to be a little bit short lengthwise and a little bit longer on the width. I didn’t want to cut the hessian as it has a tendency to unravel so I just sewed in to fit. I also needed 20 centimetres of fabric because the hessian bag was just that little bit short and I really didn’t have anything appropriate in my fabric stash until I remembered I had 1 black pillow case in the linen cupboard which probably wasn’t going to be used for it’s intended purpose and it worked out well for the extra 20 centemetres https://theleafsnation.com/account/ required for the length of the chair pad plus ties to tie it onto the chair.

After cutting the black fabric to size, sew onto the opening of the hessian sack which has been sewn in to fit the width of the chair.

Turn right side out ready for sewing ties on.

You’ll need 6 ties per chair, two at the top, two at the middle and two at the front of the chair pad. Sew strips of black fabric and turn right side out. Insert open seam on ends into itself and sew to close.

Give the hessian sacks a bit of a press with a hot iron, ready for sewing the black ties onto.

I thought I’d get a little bit creative with the chair cushions and make a stencil with the word “CHILL” on it just for the sake of it. This was just typed up in Microsoft Word and using a Stanley knife cut out the letters.

Place on the hessian and mark out the letters with a permanent marker.

Colour in and finish with a full stop (which is just a circle). Make sure you have an old piece of card or paper underneath or the permanent marker will come through on the other side.

I toyed with the idea of making removable cushions but I just couldn’t be bothered. I have quite a large washing machine so they would fit in there or a good scrub with a scrubbing brush and some soapy water would clean them with a rinse off with the hose. Once you’ve sewn the ties on in place, insert the chair seat cushion and sew into place.

Insert the cushion for the chair back and pin the top opening ready for sewing. It can be a little cumbersome with the cushions inserted but by taking my time and persevering, they worked out okay. It was a quick afternoon job and I didn’t have to spend a cent. (Although technically I bought the hessian sacks some time ago, the black paint and cushion inserts, it’s all about using what you’ve already got.)

So there you have it. Two outdoor chairs for our newly created outdoor space that didn’t cost a thing. This space came in very handy on the wedding day because it was a great space to just ‘chill out’.

They may not fit 100% or look professional like the store bought ones but they do the job and they’re individual which is what I like. Next job is to paint the house and the fence. Slowly but surely we’re getting through all the things on the to do list.

PS I must’ve been baking on this particular day and had greasy fingers which marked the camera lens.

Friday, January 3, 2014

New floors


If you don't follow me on Facebook you wouldn't have seen the announcement and pictures of my new polished floors just before Christmas. Let me tell you, it was a long time coming.

The floor coverings were mainly carpet in the living room, internal stairs and bedrooms. There are tiles in the bathroom and toilet and there was vinyl on the kitchen/dining area. My ex husband decided that he and his mate could rip up the carpet and vinyl and polish the floors themselves. This was August 2011. Needless to say it never got any further than ripping the carpet from the living room area, internal stairs and the vinyl from the kitchen/dining. What was left was bare timber floors with paint splotches everywhere. It was really ugly and really awful to live with.

With all the turmoil of the marriage breakup and my Mum passing away in 2012, it was such a poignant moment for me when I opened the door to my house upon our return from our holiday to Coolum beach (mid December 2013) to see beautifully polished and varnished floors throughout the whole house. It was reasonably priced by the man who did it and he did such a fantastic job. I'd kept a little money aside to get the floors done and take the kids on a holiday. If you see the before photos you'll see how bad it really was. Anyway, the painting of walls awaits, washing windows, putting up new curtains and blinds and bringing back all the furniture into the house and the place will really feel like new and all ours.

Sorry to bore you with photos but here are the before and after photos.


Thursday, January 2, 2014

New floors

If you don’t follow me on Facebook you wouldn’t have seen the announcement and pictures of my new polished floors just before Christmas. Let me tell you, it was a long time coming.

The floor coverings were mainly carpet in the living room, internal stairs and bedrooms. There are tiles in the bathroom and toilet and there was vinyl on the kitchen/dining area. My ex husband decided that he and his mate could rip up the carpet and vinyl and polish the floors themselves. This was August 2011. Needless to say it never got any further than ripping the carpet from the living room area, internal stairs and the vinyl from the kitchen/dining. What was left was bare timber floors with paint splotches everywhere. It was really ugly and really awful to live with.

With all the turmoil of the marriage breakup and my Mum passing away in 2012, it was such a poignant moment for me when I opened the door to my house upon our return from our holiday to Coolum beach (mid December 2013) to see beautifully polished and varnished floors throughout the whole house. It was reasonably priced by the man who did it and he did such a fantastic job. I’d kept a little money aside to get the floors done and take the kids on a holiday. If you see the before photos you’ll see how bad it really was. Anyway, the painting of walls awaits, washing windows, putting up new curtains and blinds and bringing back all the furniture into the house and the place will really feel like new and all ours.

Sorry to bore you with photos but here are the before and after photos.