Showing posts with label House. Show all posts

Saturday, April 2, 2022

How to upgrade your home for free without moving

Are you outgrowing your house? Feel like you need to move? There might be a way to upgrade your home without moving. It’s what I’ve done over the last 22 years since I’ve been in my house. Here’s how.

When I purchased this house with my (now ex) husband 22 years ago, we had plans to have children eventually one day so a 3 bedroom home was going to be more than enough space. In the 4 years before our children were born, there was a spare room I used with a single bed for visitors, our desktop computer (it was the early 2000’s so desktop computers were still relatively a new thing) and a second bedroom set up for visitors.

How our home started out

In the 4 years before our children were born, there was a spare room I used with a single bed for visitors, our desktop computer (it was the early 2000’s so desktop computers were still relatively a new thing) and a second bedroom set up for visitors.

I thought there was more than enough space for our clothes in the built in cupboard in our bedroom and there was a freestanding wardrobe in the third bedroom and plenty of cupboard space in our relatively small kitchen. No real pantry as such but I certainly could make do (and just quietly, love my small kitchen – there’s less to clean and it functions perfectly).

My ex always though there wasn’t enough storage but not having a lot of clutter, back then, I found it quite easy to fit everything in that we owned.

The converted garage

We were lucky that we had what was a converted double garage under our house that was an entertainment room. There was a built in bar, a pool table, a dart board and a TV. Everything that a young couple, soon to be married needed to entertain family and friends. The downstairs laundry had enough room for the washing machine, a dryer and storage under the internal stairs.

I was an avid gardener back in those days so one of the first things we did was put in a downstairs second toilet. It saved me having to run upstairs to our only toilet if I was in the middle of yard work.

The next thing we did was put in a double carport with a solid roof. There was only a timber structure with mesh to cover and it didn’t provide much protection to our vehicle if it stormed.

Getting a double shed

The next thing we did was put in a double shed in the back yard. This was a huge expense at around $10,000 but well worth it in the end. It is now a really great space for storing garden equipment, a workout space, kid’s wet weather space, out of season clothes, Christmas decorations and tools for my now husband to do odd jobs. (My ex didn’t keep the space very neat and tidy so it was a nightmare to find or store anything so a bit of a wasted space all those years ago. It’s been a great asset to the house and come in very handy. It has allowed any storage that didn’t fit inside the house to be stored in the shed.
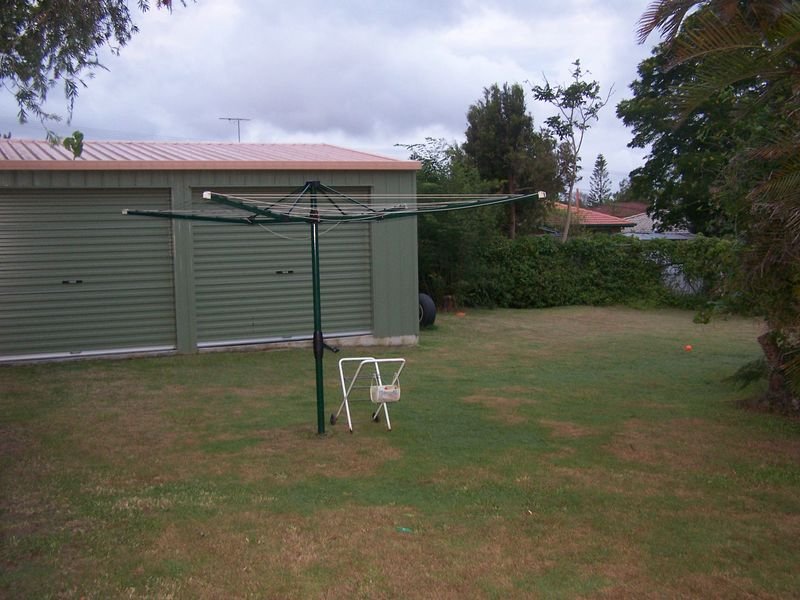
In saying that, we have tried to declutter all of these things in the shed. There is no point in holding onto them. My husband keeps it very neat and tidy and uses wall and ceiling space to store things out of the way like his surfboards and gardening equipment.

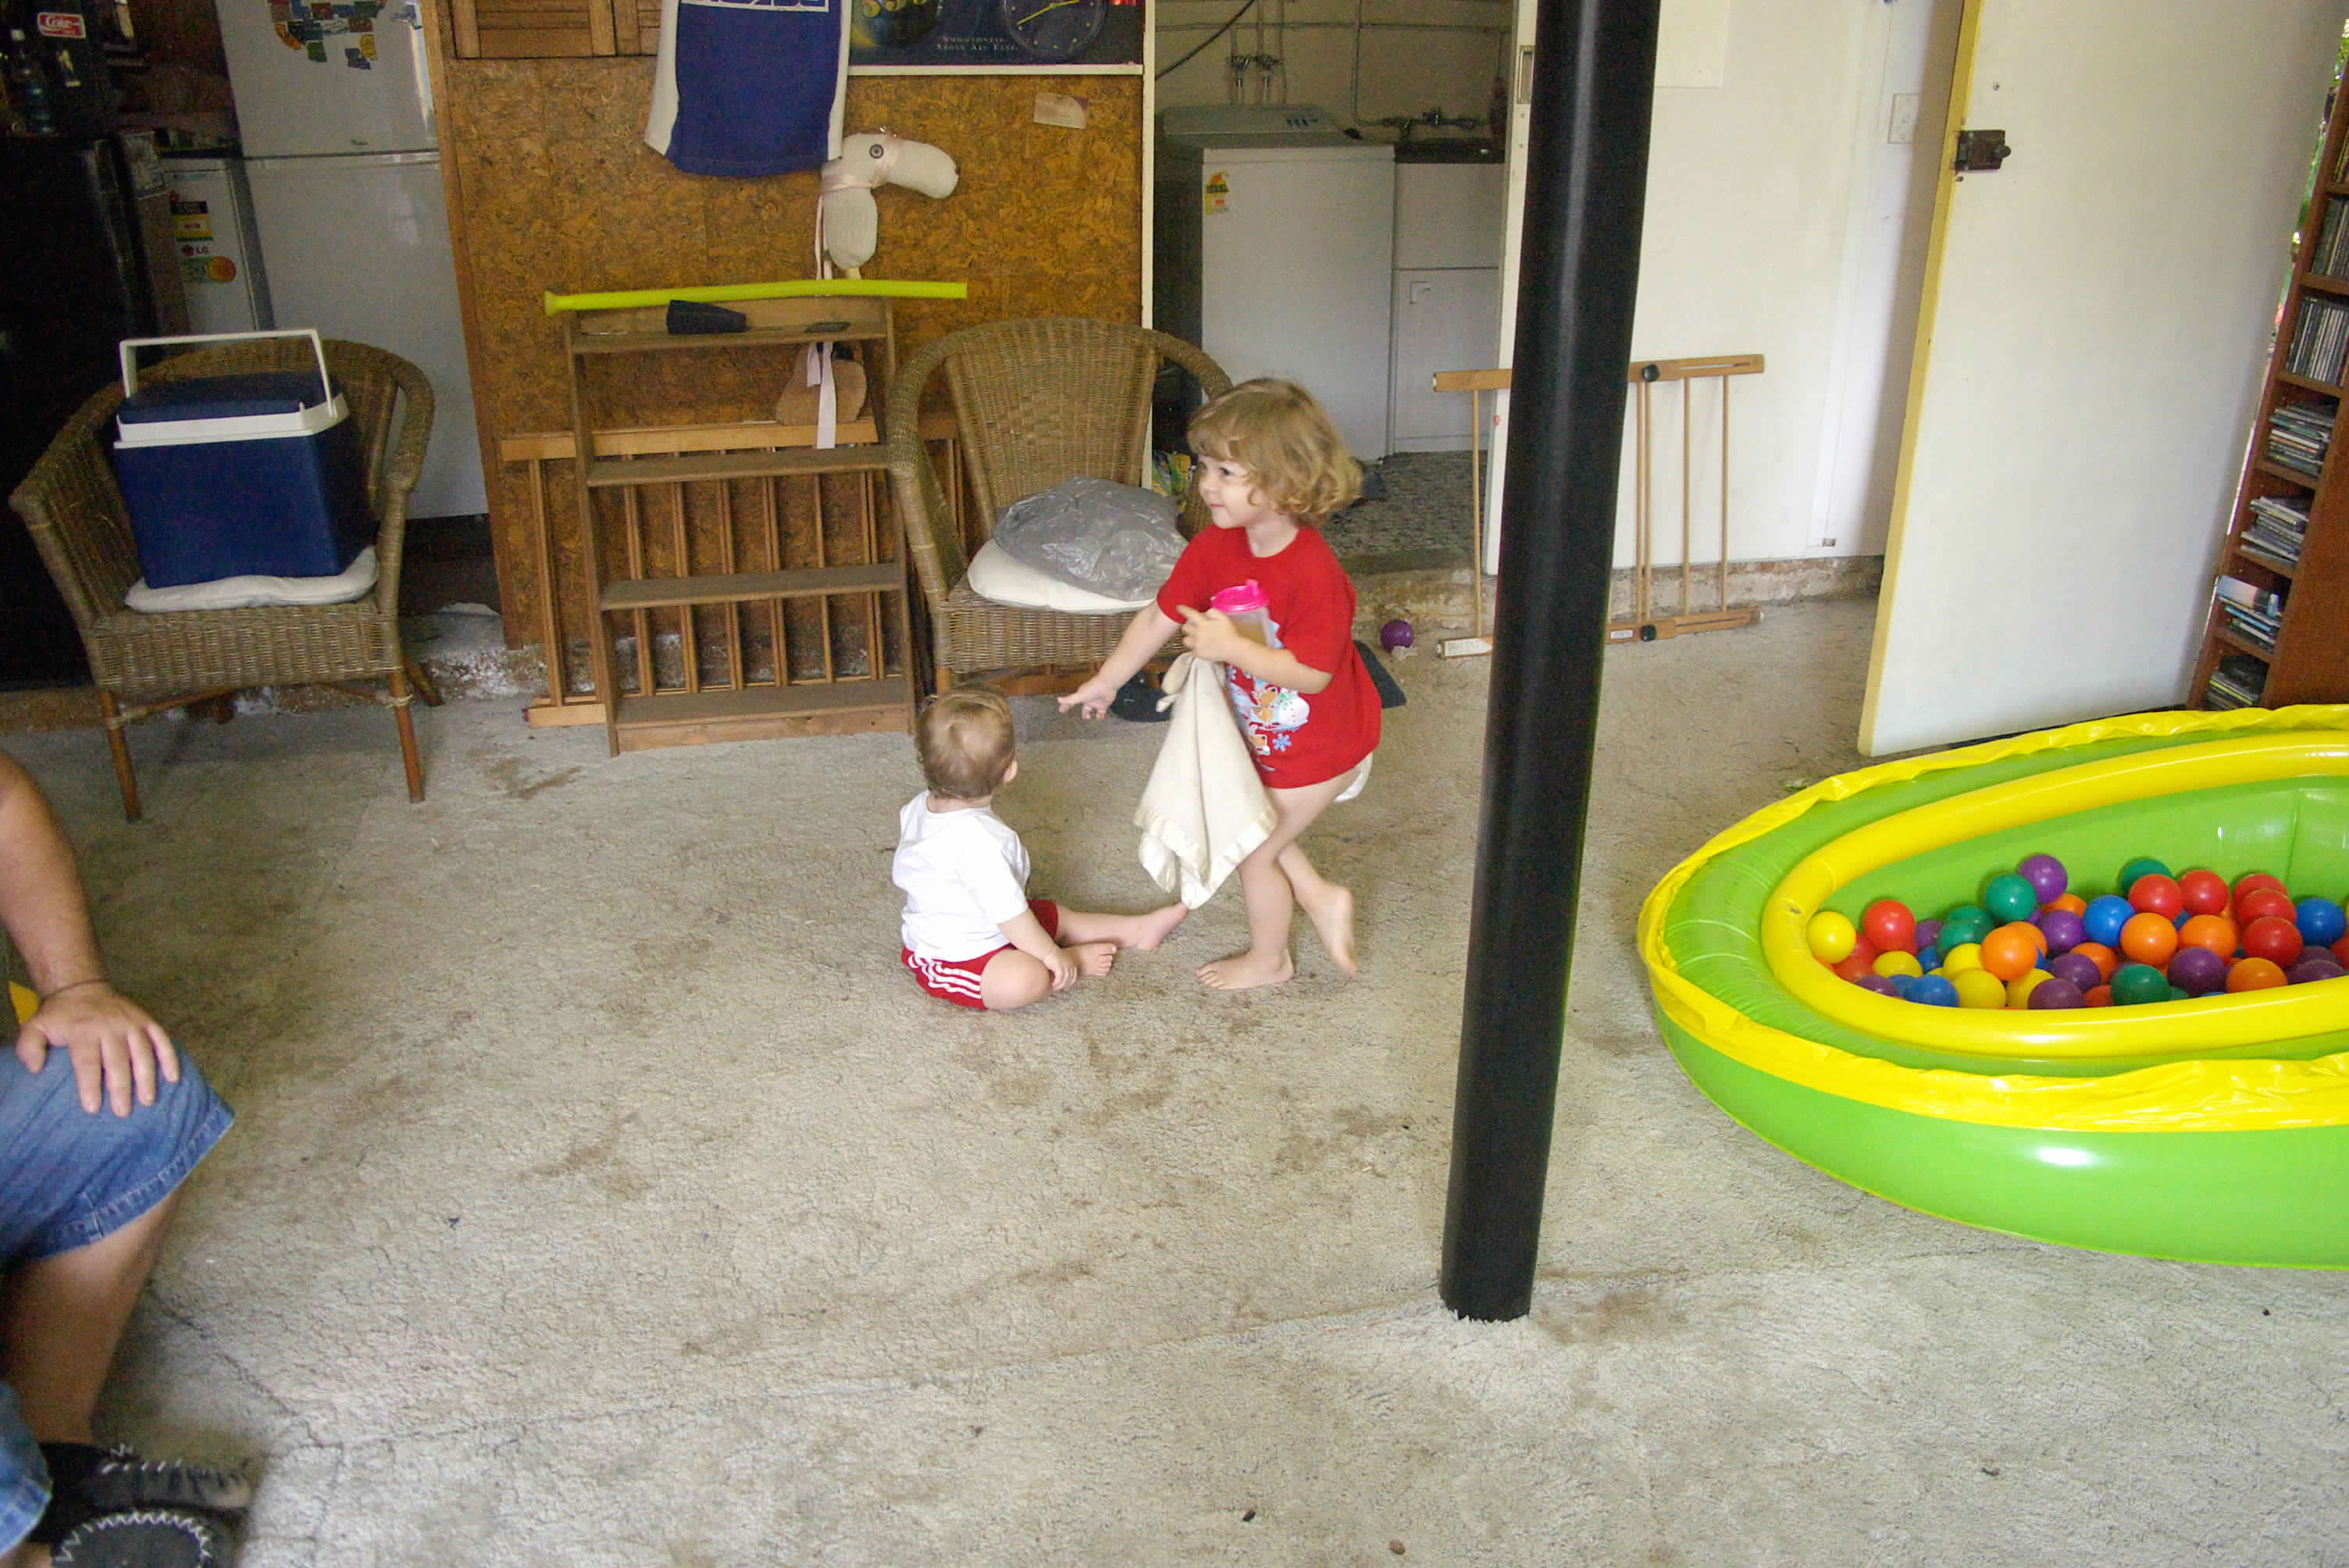
When the children arrived, sadly the days of entertaining and partying were over so it didn’t take long for the downstairs room to become a convertible space for visitors. We had a convertible lounge/fold out bed that my in laws used when they visited. There was a fridge downstairs so they could make their own tea and coffee. Also that downstairs toilet. They could come and go as they pleased and joined us for meals.

How the house changed when the children came

Upstairs, the third bedroom became the nursery. Two years later, my second child was born so the first baby went into that second bedroom and the new baby stayed in the nursery.
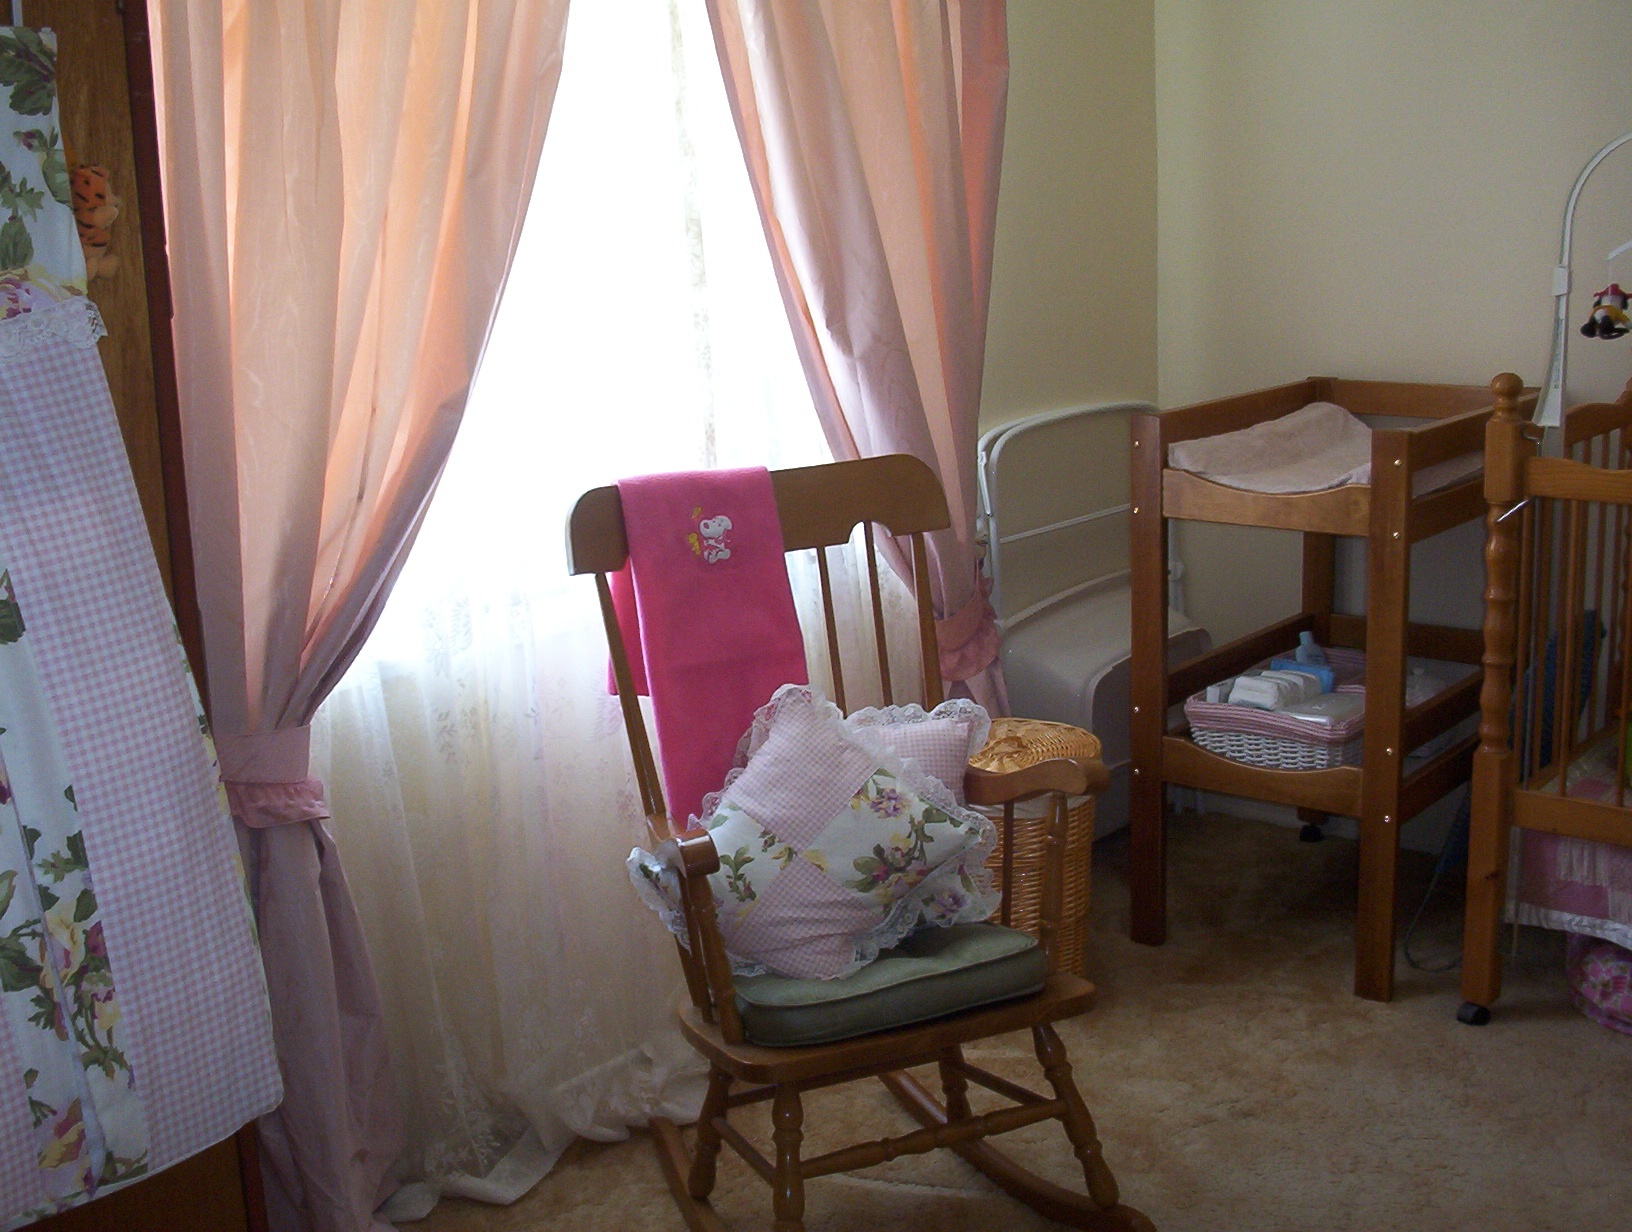
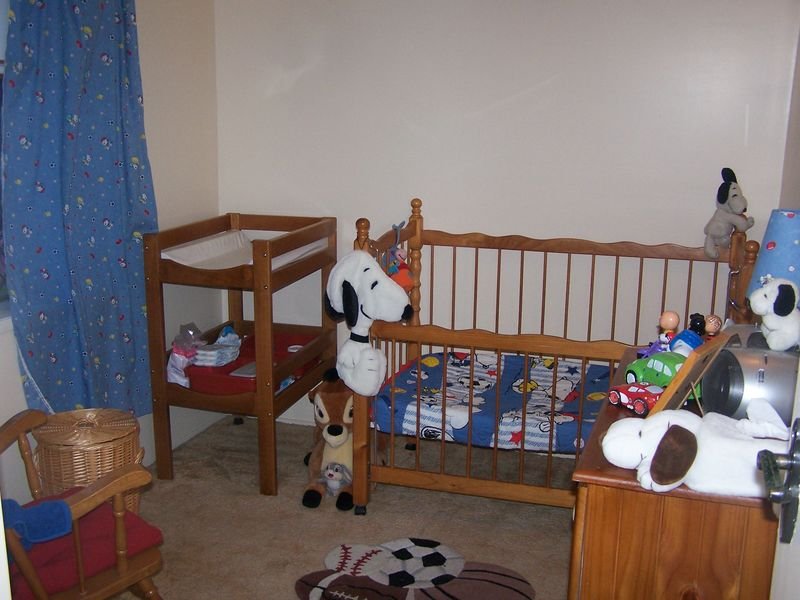
Built-in cupboards were put in both the second and third bedrooms nearly tripling the amount of storage space I now had in my house. Out of that came a linen closet. Something I hadn’t had before but made do with a freestanding wardrobe.

When the children were babies (both born in November), it was hot in the summer and I tried to stay indoors in the air conditioning so the living room became the play room. There was a blow up ball pit, a box of toys each (that were on rotation) and we painted outside and drew at the dining table. As they got older, that downstairs room became their play area with a TV/video player, lounge and our computer (where I started this blog all those years ago).

It was also my sewing space, craft area and where Santa would leave the presents for the children under our tree.

The downstairs room became such a convertible space over the years. The trouble was, it was only ever a built-in garage with a cement floor that the previous owners had converted into that entertaining space all those years before. We had no clue that it could or would ever flood as we hadn’t seen flooding in my home town of Brisbane since 1974.

Making changes after flooding

By my daughter’s 7th year, things were going to change with the downstairs room. Heavy rain came in 2011 that flooded the downstairs room. Carpet had to be thrown out, timber swelled around the walls. We had a terrible mess. Little did I know that over the years we would get even more rain and every attempt at rebuilding the space and reconverting it to something bigger, better and more useful met with more heartbreak.

After the last rain of 2022 where we received a year’s worth of rain in 3 days and we were flooded again, we decided to keep the downstairs room as it was intended and that was a concreted floor garage that has a few lounge chairs and my son’s gaming equipment, ie TV and PlayStation.

The room still needs a bit of work to make it look nice, ie painting walls and ceilings, painting the concrete floor with a non slip paint and a new blind for the window. Just small cosmetic fixes. But the home office/craft space is now in the spare bedroom and that’s a job and a half to sort through.
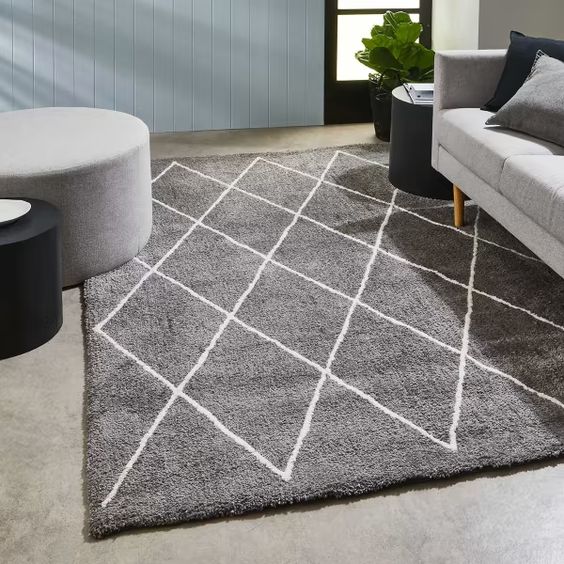
I’ve been having a big declutter and trying to make the space still calm and that’s been a work in progress. The upstairs living room, which was just a quiet space to sit and read, without a television, is now a homely and cosy space again. We purchased 2 x $79 rugs and repurposed the TV unit to hold all of the sound system and television.

There’s still a bit of sorting and decorating to do but not too much. As it’s coming into winter, the throws will come out and I can give it an update with a few new cushion covers.

Conclusion

You can outgrow a house but you can look at it as rather rethinking a room or space. Ask yourself:

  • Can I repurpose this room?
  • Can I reuse furniture and décor that I’ve already got?
  • If I haven’t used or touched something taking up space in this room, can I donate, sell or repurpose it?

We are so influenced by what we see in magazines, on television and on social media to think that we need a bedroom for every child, a bathroom for every person in the house and a toy room, a walk-in pantry, a kitchen island (and the list goes on). Unless you can really afford to move and upgrade to a bigger house (and bigger mortgage), stay put, enjoy the home you already have and rethink spaces.

PIN FOR LATER

Thursday, December 30, 2021

Garage Door Repair: DIY Or Professional?

Your garage door offers you great service daily. It conveniently allows you to drive in and out of your home and protects your vehicles from harsh weather elements. Therefore, taking good care of it is recommended to ensure it serves you for longer. 

That said, even the best-maintained garage doors develop problems at least once in their lifetime. They could get stuck, become noisy, start moving unevenly, or stop closing or opening. On such occasions, many homeowners may find themselves in a dilemma choosing whether to do the repairs themselves or hire a professional. 

Factors That Determine If A Professional Or DIY Garage Door Repair Is Suitable

If your garage door has a problem, immediate repairs are necessary. This is because the door might not perform as it should, which could be a huge inconvenience to you and our family. Also, a malfunctioning door might not protect your vehicles from the harsh weather elements or offer sufficient safety to your home.

Therefore, even if your garage door may only seem to have a minor issue, it’s advisable to restore it as soon as possible. This way, you’ll prevent the issue from developing into a more complicated problem that may be more costly to fix.   

If you’re confused about whether to do the repairs yourself or hire a technician for the job, this article could be helpful. Here, you’ll learn about several factors that could determine who’s suitable to do the job. These are:

1. The Repair May Take Time

If you’ve done garage door restorations several times before, you may have gathered adequate knowledge on how to fix any problem. Therefore, it’ll be easier for you to identify the root cause of your garage door issue. Once you’ve done so, you’ll get straight into the repairs using less time to restore your door.  

If you hire a professional, they’ll first have to examine the situation then come back later for the repairs with the right tools. If they have other jobs scheduled, you’ll have to set a date for them to come to restore your door.

This means that repairs will be delayed, and you’ll stay longer with a damaged door. In this case, DIY restorations may be quicker if you have the expertise to handle the task.  

However, hiring a professional may be more recommendable if you don’t have the experience or proper skills to fix a garage door. Even though you could find videos or articles online to do the required repairs, you’ll take time learning, and any errors could delay the restorations even longer.

Therefore, it’s better to have a technician handle the repairs in this case, preferably a local individual. This means, if you need a garage door repair Mooresville NC or similar services, consider hiring professionals around your area. Such people will get to you faster than an out-of-state technician, thereby finishing repairs quickly.

Besides that, since transport might not be a huge expense to them, they could charge you less than what an out-of-state professional could.  

2. Cost Of Repairs

If you have the required skills and tools to restore your garage door, DIY repairs could help you save some money on the cost of hiring a technician. However, if you don’t, you could spend more cash than you would have used if an expert did the restorations for you.

This is because you’ll need to buy tools, some of which can be expensive. Also, if you make errors causing secondary damage to the door, you may incur additional costs if you have to hire a technician afterward. 

On the other hand, a professional will report to your home with the right tools at hand. Also, they’ll do the job right the first time, with zero or minimal errors. Therefore, the only cost you’ll have to pay is the final charge you initially agreed on with them.

This means, if you were planning to improve the entire garage or other parts of your home and only set aside a certain amount of money to repair your damaged garage door, you won’t go over your budget.   

Besides that, some technicians offer a warranty of service. This way, if the garage door isn’t sufficiently fixed the first time and it develops other issues, you won’t have to pay for repairs the second time.  

3. Types Of Repairs

The choice of whether to hire a professional or do DIY restorations on your damaged garage door may also depend on the type of repairs required. Usually, there are some restorations you can handle yourself, while others may need a professional.  

For instance, a frozen garage door may only require a hairdryer or heat gun to free it from ice. Also, if only a single hinge is damaged, this may be easy for you to repair. However, if you have multiple malfunctioning hinges, restorations can be complex, and therefore, a professional may be more suited for the job.

Also, broken door panels or springs might need a technician because these tasks require a person who knows how to do the job sufficiently without causing secondary damages or compromising their safety. Therefore, an initial assessment of the problem with your garage door is essential. It’ll help you decide whether to do the repairs yourself or call a technician.  

Conclusion

Your garage door requires proper maintenance to ensure it stays in good shape for longer. However, these doors sometimes get damaged or malfunction even if you’ve taken great care of them. On such occasions, it may be challenging to decide whether to hire a professional for the repairs or do the restorations yourself.

If you’re in such a dilemma, this article provides some factors that may help you identify who may be suitable for the job. They include the restorations’ costs, the types of repairs required, and how much time the task may take.  

Saturday, December 18, 2021

6 Home Upgrades That Can Improve The Value Of Your Home

If you’re planning to sell your house fast and at a better price in the future, you need to improve your home’s value by considering upgrades. Here are 6 home upgrades that can improve the value of your home.

6 Home Upgrades That Can Improve The Value Of Your Home Domesblissity.com

There are many home upgrades you can do to maximize the value of your home. However, it’s crucial to note that not all upgrades can be recouped. With that in mind, make sure to choose upgrades wisely to get the best value for your investment.

If you’re confused with the available options for you, below are the home upgrades that you can consider:

1. Spruce Up Your Kitchen

It pays off to consider both the functionality and aesthetic appeal of your food preparation and cooking space when it comes to kitchen remodeling. Revamping your kitchen space should equate better workflow and movement to accomplish its primary purpose. Hence, you should consider the comfort level, air ventilation, lighting, and overall layout.

The cost of kitchen upgrades can be expensive, but you don’t have to install new appliances just to give your kitchen a makeover. The prices depend on whether you prefer a luxury or midrange upgrade like updating your plumbing. For instance, if you plan to replace your water heater, you can find out more here.

There are also cheap kitchen renovations you can do, and these include updating your cabinet knobs and drawer handles and painting your outdated wooden cabinets with a neutral shade. These can go a long way in making your space feel fresh.

2. Replace Your Old Roof

Putting on a new roof will help you earn a big ROI. Because your roof is one of your home’s critical elements, it’ll be a top concern for most buyers. In fact, an old or poorly-maintained roof can be a deal-breaker.

There are some options you can consider when it comes to an unreliable or leaky roof. Depending on your budget, you can either replace your entire roofing system or hire roofers to repair some parts of it.

Choose a roofing material that’s suitable for the climate you usually experience in your locality. If you have a hot climate, the best roofing system includes clay tile, metal, or asphalt shingle. Metal and slate roofs are highly recommended for cold climates, resisting extreme temperatures, hail, wind, storms, and even fire.

3. Remodel Or Renovate Your Bathroom

Simple bathroom upgrades can increase your home’s value. However, if you have an old house, this task can be expensive and complicated, so it’s best to consider if it’s necessary.

6 Home Upgrades That Can Improve The Value Of Your Home Domesblissity.com

When you decide to update your bathroom, you can just change your old plumbing fixtures or add tile backsplashes. Other smart changes you can make include adding tile flooring and upgrading your lighting fixtures.

If you opt for a complete bathroom makeover, it involves tearing out the walls, putting in some additions like a jacuzzi, and hiring a contractor. Some big additions you can consider include heated floors and a new bathtub.

Hiring a professional contractor specializing in bathroom renovation is a good idea to get expert advice. A good contractor knows where to source excellent quality bathroom fixtures at reasonable prices. Make sure to obtain a rough estimate of the material and labor costs to avoid surprises. You might want to compare at least three bathroom remodeling contractors and interview them before signing anything.

4. Add Home Automation Or Smart Technology

A property with smart home features is always a plus for most buyers, especially the millennials. If you want your home to boost its value and stand out in the real estate market, it’s time to add smart devices in your home.

One of the smart additions you can consider is the installation of smart thermostats. Although it’s nothing new, the latest generation of smart thermostats comes with an app, making it easy to use and set up. It gives you control of your home’s temperature wherever you are.

Make sure to invest in home security with automated alarms, sensors, and other relevant security features. This way, you can see what’s happening inside your house even if you’re on vacation. Adding smart technology or home automation can help secure and modernize your home.

5. Enhance Your Curb Appeal

In real estate, first impressions matter. Improving the curb appeal of your home can be as easy as scrubbing your home’s siding. It doesn’t always have to be pricey to be effective. You can also install a new front door to improve your home’s look.

If you want a wow factor, some well-placed vegetation and shrubbery and a well-kept lawn can do the job for you.

6. Add A Deck

The cost of adding a deck may depend on the materials you use and how big or small it is. If you have a deck, consider a new finish or adding clever deck designs to make it more attractive to your home buyers.

A porch or deck is great to have. If prospective buyers can picture themselves relaxing in the space or find it entertaining, it makes your home more appealing.

Conclusion

Your house is your biggest investment, and you want to ensure that you’ll get the best possible price for it once you decide to sell it. To achieve that, it’s essential that you consider the listed home upgrades to make your house more appealing to your potential buyers and get it sold in no time.

Wednesday, December 15, 2021

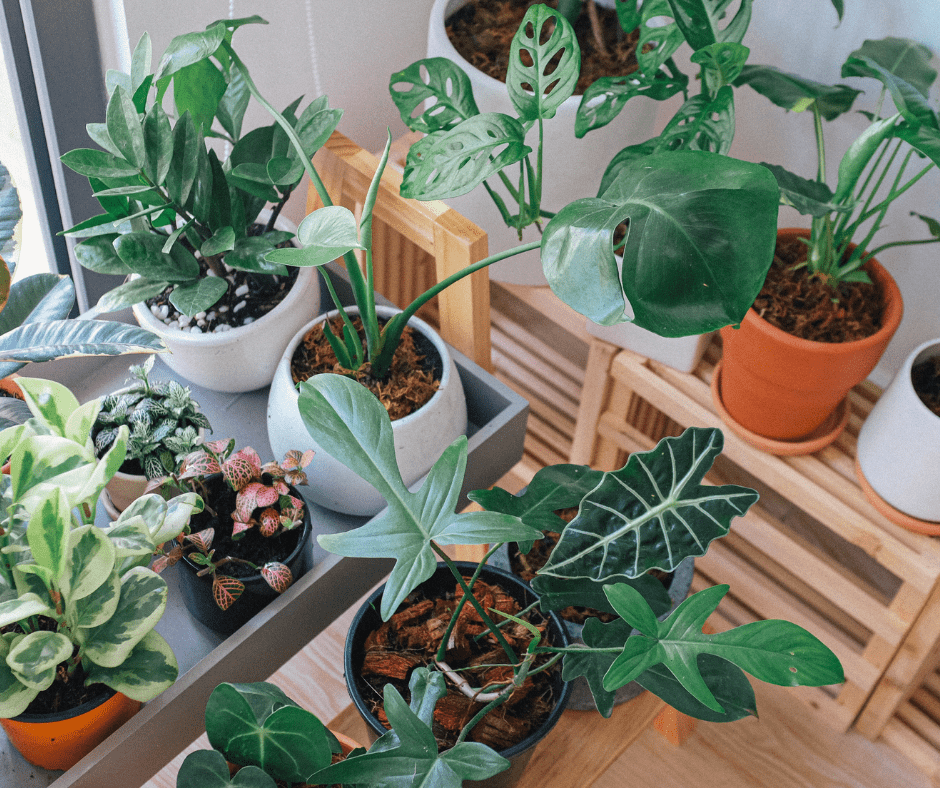
12 feature plant ideas for your new home

Twelve feature plant ideas for your new home. Find out more about which plants work best indoors to create a statement for inside your new home.

More people are considering having plants in their homes. Plants have been proven to improve one’s mood. They also improve air quality as they absorb pollutants, as well as increase humidity.  Oxygen in the air is also increased, allowing you to breathe with ease.

Aside from their health benefits, plants are also great decorations. They make empty spaces livelier. They can change bland-looking atmospheres by adding pops of colors. Designers also use plants as home décor because of their natural aesthetics.

Taking care of plants is also a low-maintenance hobby. Being a plant mom or a plant dad can be a very therapeutic past time. Plants can bring happiness and joy, just like how traveling in nature brings.

Furthermore, there are many indoor plants that are great for your new home. Here are some of your best options:

Succulent

Succulents are low-maintenance plants that require little watering. They’re great indoor plants and they require little to no sunlight. They also thrive even in the shadiest places. Some grow very small, just like a drinking glass, so they make for great desk plants.

There are many types of succulents you can choose from. Interestingly, cactus comes from the family of succulents, thus, you can start by having common succulents, such as bunny-ear cactus, prickly pear cactus, and cabbage cactus, among others.

Succulents are easy to find in local garden shops, as well as online through sites like FloraFolia.

Pothos

Pothos plants are very versatile and they can thrive anywhere. They also don’t need much care, like succulents do.

Some varieties have very green luscious leaves that resemble vines. Pothos plants have long vining stems that grow downward. They can also be great hanging plants. Most people put them on higher shelves or high areas because their stems grow downward like hair.

Bonsai

Bonsais are miniature versions of small trees. The term ‘bonsai’ is a Japanese technique of keeping trees small for ease of maintaining them.

Bonsais are great indoor plants to put on windows, center tables, or desks. Also, like any indoor plant, they require minimal sunlight. Watering them around twice a week will do, too.

Rubber Plant

Rubber plants prefer indirect light that’s not too harsh on their leaves, the reason why they’re some of the most common indoor plants. You only need to tend to them once a week, and they also don’t need a lot of watering.

There are many varieties of rubber plants. They can go from having very green leaves, while some have maroon or purple looking leaves. But, all rubber plants require the same care.

Rubber plants also make for great accent plants in homes. You can put them beside console tables or shelves. They’d also look great on hallways and doors.

Snake Plant

Snake plants are some of the most common indoor plants. Why not?  They’re easy to find and relatively cheap.

They’re very versatile plants that you can cultivate indoors and outdoors. You can also let them grow on direct soil or pots.

Snake plants have sword-like looking leaves that grow upwards. They also don’t like harsh sun and require minimal watering.

Spider Plant

Spider plants make for very good indoor plants. They usually have long, thin green leaves that have yellowish outlines. What’s great about these plants is that they’ll thrive even with minimal supervision.

Like most indoor plants, they only require minimal sunlight. They also prefer dry soils, so watering them once a week is recommended. They are tough plants that can survive even with the most neglectful owners.

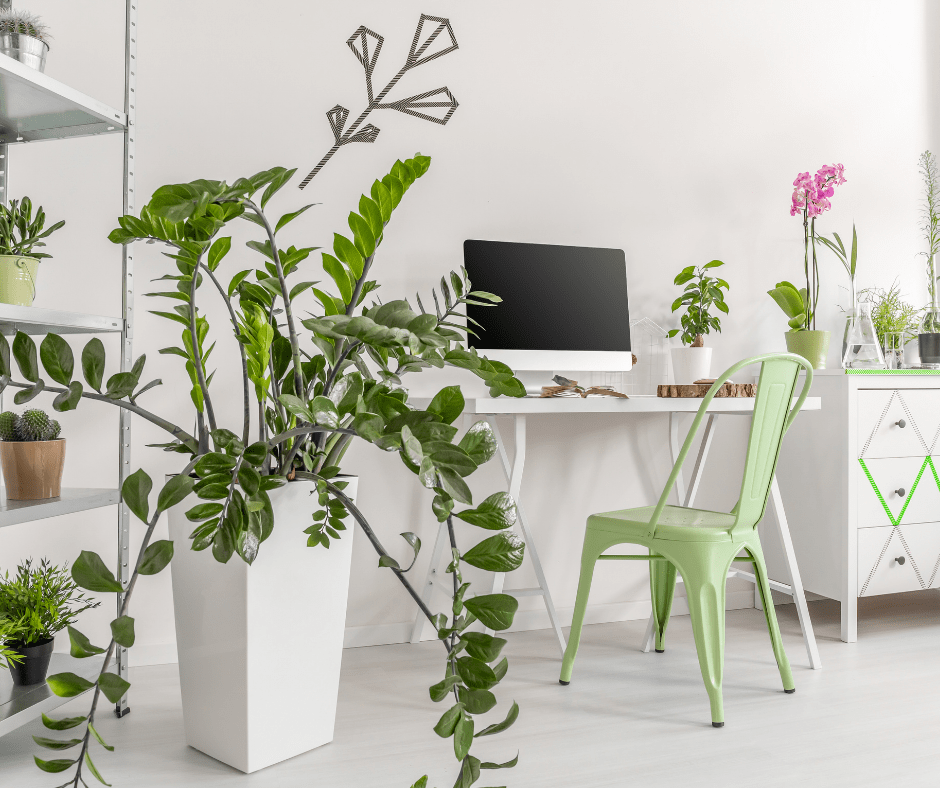
ZZ Plant

The Zamioculcas zamiifolia or ZZ plant usually has dark green leaves, and it can grow up to two feet.

ZZ plants don’t require that much sunlight, and they need watering up to two times a week. However, take note that ZZ plants are poisonous when ingested. Just make sure they’re out of pets and children’s reach.

Aloe Vera

Aloe veras belong to the succulent family. They have pointy leaves that grow upward. Like other succulents, they require minimal sun and watering, too.

People usually keep aloe veras in their homes because of their hair and skin benefits. You can just cut out an aloe vera stem and squeeze its sap. It can be used on the hair as a conditioner.

Pilea

Pileas are also known as Chinese money plants. They originated in China, but their popularity quicky spread around the world. They have circular coin-like leaves and soft stems. They should be watered only once a week, and they only need ample sunlight.

Peace Lily

Peace lilies are great indoor plants. They’re one of the few flowering plants that require low sunlight and minimal watering. They have white flowers, with yellow, brush-like erected centers called the spadix.

They’re great air purifiers as well. They grow about two to three feet, and they’re great accent plants. You can put them on large pots beside doors or along hallways.

Asparagus Fern

Asparagus ferns have hairy light green leaves. They thrive in humid places, and a little water is required to keep them alive.

They grow laterally instead of vertically, and are great for square flat pots. You can put them anywhere in your house, but it’d be best if you keep them on hanging pots.

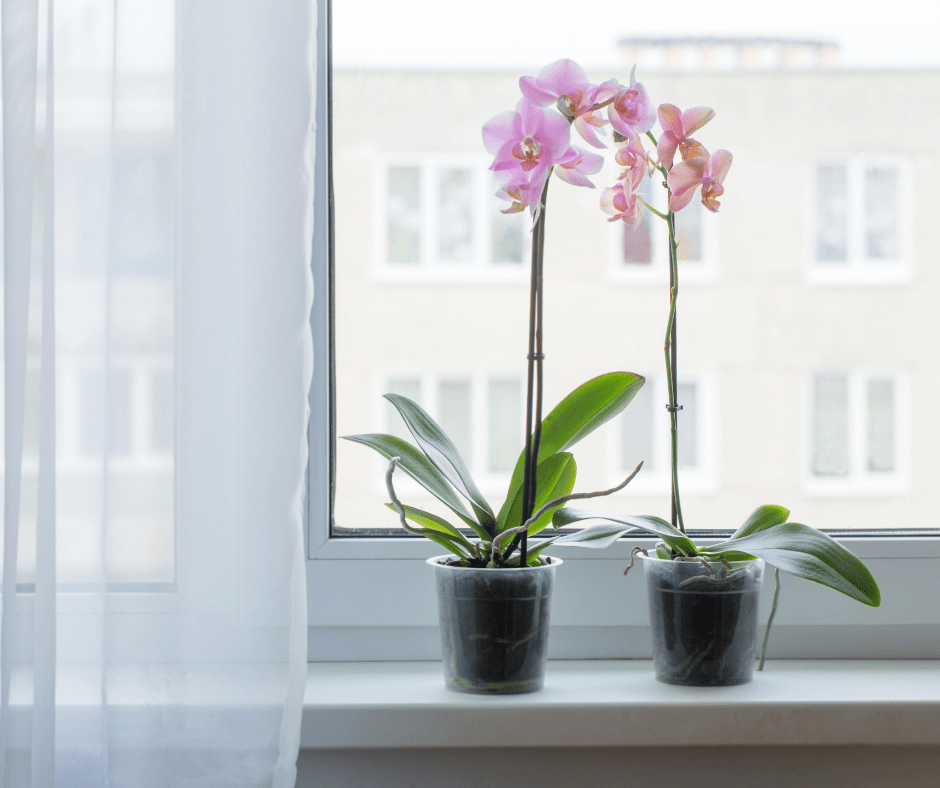
Orchids

Orchids make for great house plants, too. Some varieties only require minimal sunlight and watering. Taking care of orchids needs a little patience, although some types require more care

In addition, orchids are great decorative pieces that even designers use them as decorative plants. Orchids can be ideal table centerpieces as well. They’d also look good on vases, or you can hang them on windows.

Get Planting

Having indoor plants has many benefits for you and your family. They purify the air and they uplift the mood of the house. Taking care of plants is also a great hobby and a great way to relax.

These are some of the best indoor plants for your new home. However, you can always choose the plants you like; just make sure you know the proper way to take care of them.

Tuesday, September 7, 2021

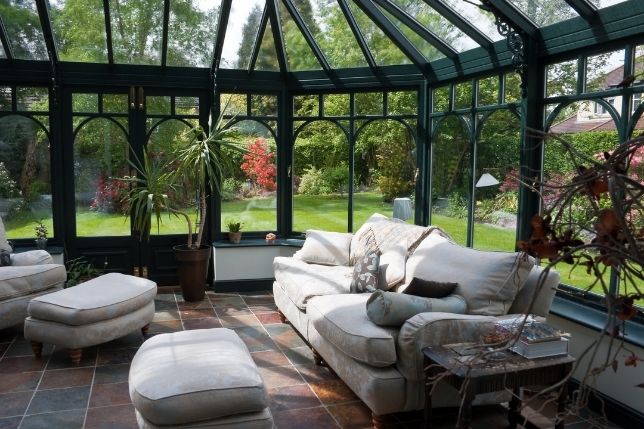
How to Make a Sunroom the Best Part of Summer

No matter where you live, if you have a sunroom, then you have a room that can bring the outdoors inside. This versatile space lets you enjoy the beauty of nature while keeping warm in the winter and comfortably cool in the summer. With our tips, you can quickly learn how to make a sunroom the best part of summer.

With lovely sunroom decor, you can have a versatile room that lets you enjoy the summer without worrying about mosquitos, humidity, and critters.

Make Your Sunroom Comfortable

The key to making your sunroom the best part of summer is to make it as comfortable as possible. You don’t need to use stiff outdoor furniture in a sunroom, so take advantage of cushy sofas, loveseats, and oversized chairs. Add enough comfortable seating for everyone in your family to enjoy the sunroom.

Another way to make sunrooms comfortable is to cover the floor with a beautiful rug. Add some large floor cushions so that people won’t have to sit on the cold, hard floor. Massive bean bag chairs and other inviting seats can make the sunroom incredibly comfortable.

Because the outdoor elements affect the temperature in a sunroom, keep blankets and throw pillows around for everyone to get cozy when temperatures drop. Keep the lighting low, as the purpose of a sunroom is to enjoy the natural light even at night. Don’t forget to add trays and end tables so that everyone can have their beverages and snacks in the sunroom.

Mix And Match Your Style

If you love a cottage core aesthetic, or you thrive on minimalism, carry your favorite style into your sunroom. Your sunroom should be an extension of the rest of your home. It just happens to be in a room surrounded by nature. 

As you move your style into the sunroom, consider pushing it a little farther. Sunrooms offer more comfort than a porch, but they can still have that cozy quality. Regardless of your style, think about how you can make your sunroom a mixture between a patio and a living room. Some people add exterior string lights with Edison bulbs for a consistently porch-like look.

While buying furniture for your sunroom, consider pieces that are flexible and moveable. You might need to rearrange your sunroom for parties, guests, and other reasons. You might want to install built-in benches with storage so that you can tuck away items that you don’t always need. Sunrooms get extra sunlight that can fade colors and damage some textiles however.

Consider Your Privacy

Unfortunately, not everyone has privacy from neighbors, so curtains or window coverings are necessary for some homeowners with sunrooms. Choose a window covering that you can easily push to the side or roll up to the ceiling so that you can take advantage of beautiful days and lovely nights. Some sunroom owners add a privacy tint to their windows to block the gaze of nosy neighbors.

Natural window coverings like bamboo or woven shades keep your sunroom looking like an outdoor space. You could also add plants outside of your sunroom to provide privacy, while some people install awnings. You can also add a privacy fence around your yard so that you don’t have to put window dressings in your sunroom.

Add Heating And Cooling Elements

Sunrooms can become extremely hot in the summer and cold in the winter. As you’re looking to make a sunroom the best part of summer, consider adding a reconditioned PTAC unit to it. You might not need air conditioning all over your home, but a wall unit in your sunroom might be the perfect solution to summertime heat and humidity.

You could add an electric stove or freestanding fireplace for cold winter months so that you get the right amount of heat for a minimal amount of money. Anyhow, you’ll only be using your PTAC unit for air conditioning and freestanding fireplace when needed so that your energy bills stay low.

On days without a breeze, use fans to get the air moving. Some people install ceiling fans with beautifully designed blades for a true outdoor look. Add the heating and cooling elements that make your sunroom comfortable.

Pick The Perfect Flooring

When you design your sunroom, consider the floor. It’s time to move to high-end tile, stone, or tile. If you spend cool winter days in your sunroom, add radiant heating elements under the flooring. Choose a durable floor that may get wet and is easy to clean.

Add Plants And Flowers

Another way to turn up the beauty in your new room is to add plants and flowers. With so much focused sun, your plants can thrive in a sunroom. Ferns, lemon trees, and jade plants love the sun and thrive in bright sunrooms. You can have fun decorating your plants through the summer with little ornaments and holiday decor. Consider adding seasonal flower pots in your sunroom too.

Have Fun In The Sun

Sunrooms are perfect spaces for entertaining. The comfortable areas are easy to decorate, especially for children’s parties or book clubs. When you have your party in one room, you have less to clean up at the end.

Many people leave electronics out of their sunrooms, except speakers so that they can listen to music while relaxing. Don’t hesitate to add a TV or video game console. It’s your space, and you can do what you want in it.

Be Creative

Sunrooms can be more than space for a pair of couches. You can use it as a guest bedroom, a home office, dining room, game room, or a personal yoga studio. They can be breakfast nooks, she sheds, and playrooms. The only limit is your imagination.

You can make your room a space that you never want to leave. With comfortable seating, useful touches, and beautiful surroundings, your decor can make that space the best part of summer and your home for years to come.

Thursday, July 29, 2021

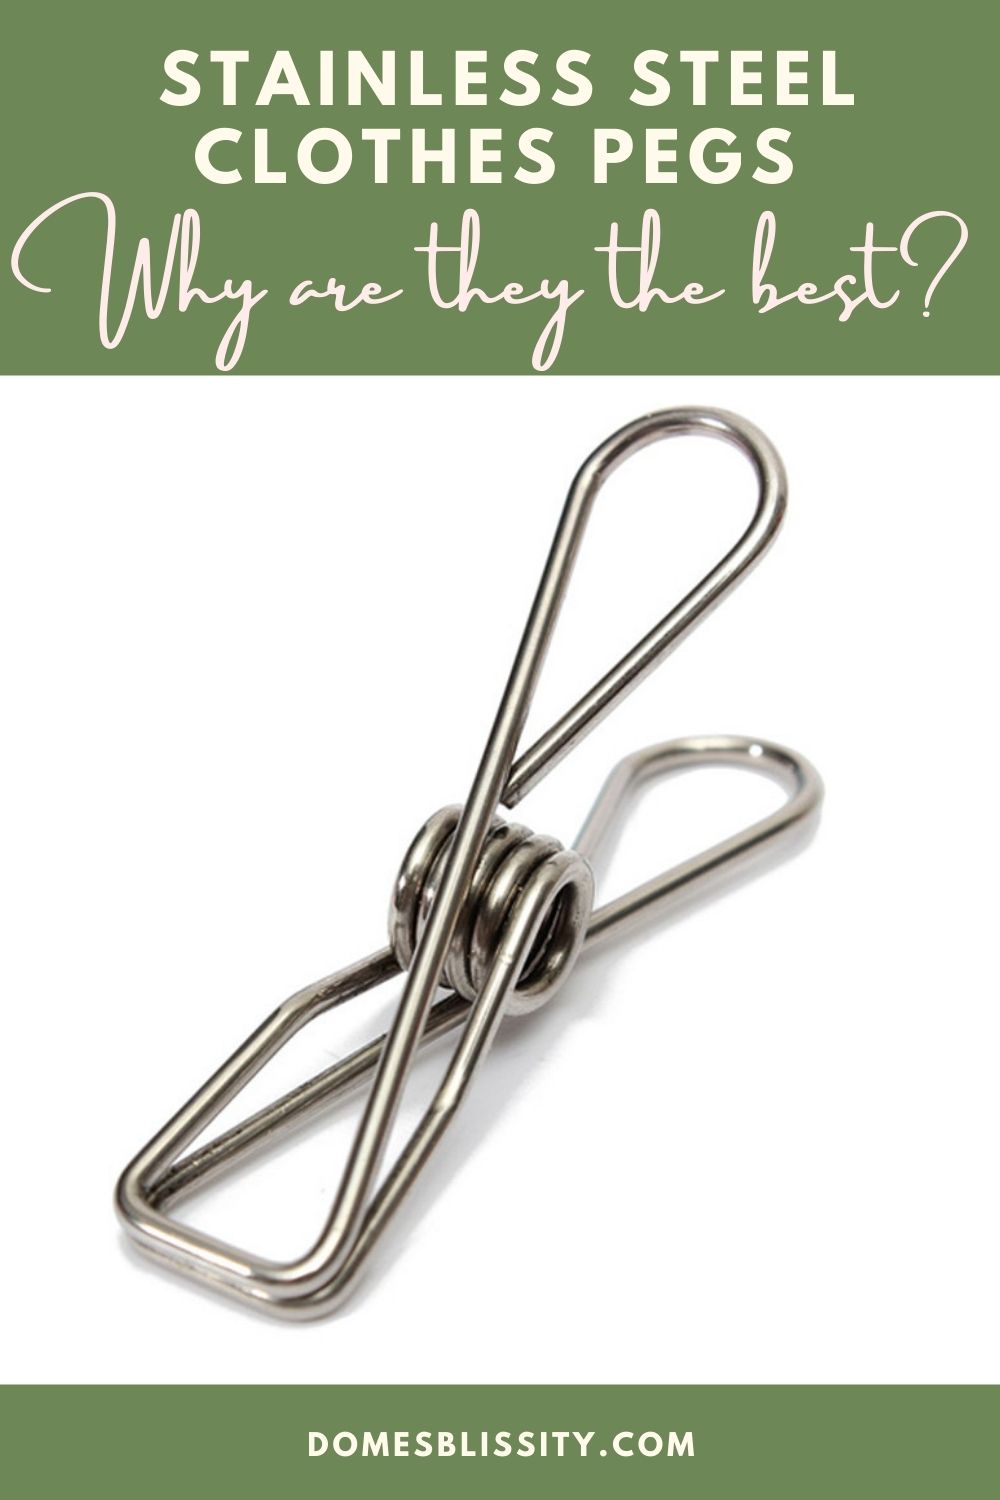
Pegs: Why stainless steel clothes pegs are best

Do you still hang your clothes out on the clothesline? Yes, same here but it seems to be a little old fashioned now and not many people have the time, opting to use the clothes drier to get the laundry dry.

There are many reasons why using the natural sun to dry your laundry is best but why are stainless steel clothes pegs the best? This is why I think they are.

Is your climate right for using clothes pegs

I’m extremely lucky that I happen to live in a sub-tropical climate here in Brisbane, Queensland, Australia so we have pretty much all year round sunny weather.

Except for a couple months a year when the temperature might drop to under 20oC (68oF) in winter, we have the perfect weather. Even in winter, the sun shines warm enough and long enough for us to get our laundry dry. (Maybe thick doonas and blankets need a dry, windy day in the middle of winter.)

For those who live in snowy conditions, hanging your laundry outside isn’t probably ideal but definitely worth it in the summer months.

Stainless Steel Pegs are environmentally friendly

Unlike plastic clothes pegs, stainless steel pegs are made from marine grade steel so are easily recyclable unlike plastic pegs.

Plastic pegs deteriorate from being in the sun, from wear and tear, age and those with a metal spring just give up over time.

Wooden pegs also contract mold and mildew if left out in the elements.

The stainless steel clothes pegs are made from marine grade 316 1.7mm stainless steel so they won’t rust. They have been constructed as one piece so the spring of the peg mechanism forms part of the entire peg.

They are also good for the environment in that they are fully recyclable.

Stainless steel pegs have many uses

Just as I am with food and anything else I buy, if a product has more than one use, I’m happy.

Stainless steel pegs have been great for many other uses in the home including:

  • paper clips
  • clips for using in sewing, quilting and other craft projects
  • use to guide creeping plants and vines
  • hanging children’s artwork
  • hanging Christmas cards
  • strong enough to hang washed shoes and toys on the clothesline
  • keeping packets closed in the pantry and freezer and I think a few have gone missing in the shed for my husband’s various home DIY projects.

Conclusion

For the price of the stainless steel clothes pegs compared to cheap plastic pegs, you’ll have the stainless steel pegs for a lifetime with the ability to use them in many ways in all areas of your home. They’d make a great practical housewarming or wedding gift for someone.

PIN FOR LATER

Tuesday, June 22, 2021

How To Make Your Hardwood Floors Last Longer

Hardwood flooring may be one of the most popular floor choices among homeowners. It’s versatile in terms of use and style and has a natural appeal that may offer homes a distinctive look and attractiveness.

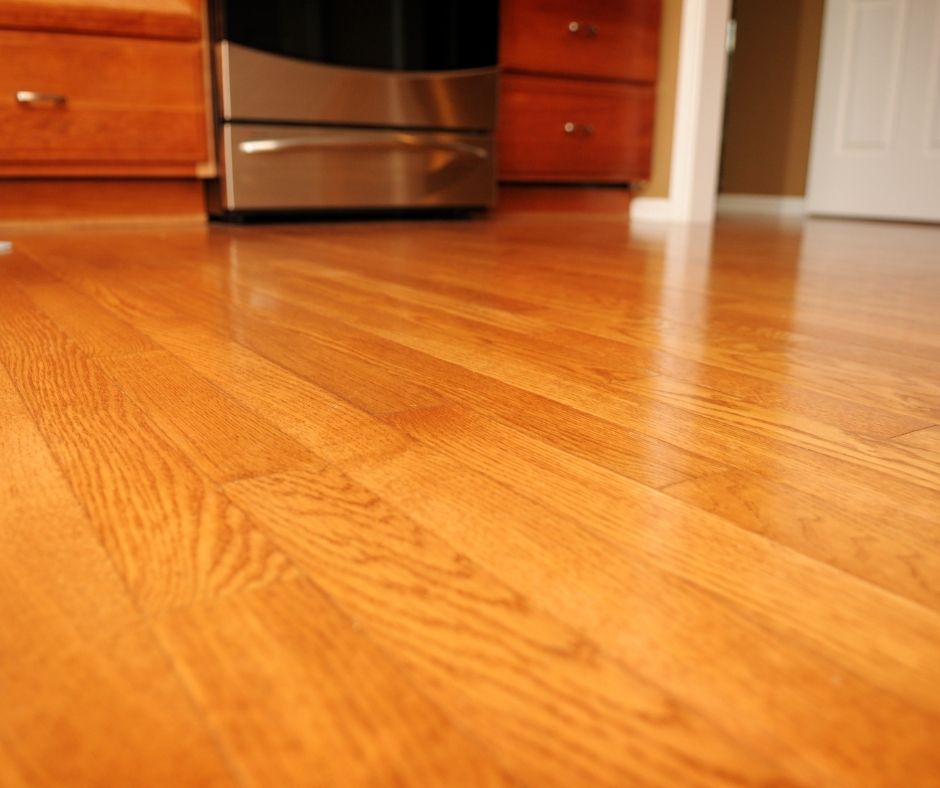
hardwood floors in kitchen

If you’ve installed engineered hardwood flooring in your home as well, you’d want to keep it clean and unscratched. After all, hardwood floors are not at all inexpensive, so you want to make sure they last. Fortunately for you, maintaining them for long-term use is easy to do. Here’s how you could go about it.

Sweep The Floors Regularly

Sweeping your wooden floors on a regular basis may help prevent dust and grit accumulation. To prevent scratches on the wood, it’s advised to use a broom with soft bristles.

Sweep away any dust or debris on the surface, especially areas that are always walked on, such as the entryway or hallway.

Dust The Floors 

Don’t forget to schedule a regular dusting of your hardwood flooring. You may use disposable dusting mops, which have a slight electrostatic charge to take up more dust and debris from your floors. They’re generally quick and simple to utilize, and you could simply discard them after use.

You may also try a dry mop with an ultra-soft head to pick dust particles and smudges. When dusting and mopping, make sure to also reach places where dust particles love to linger, such as corners and crevices.

Mop The Floors Every Month

If you want to thoroughly clean your floors without stripping or straining the hardwood, use a mop specifically designed for hardwood as well as a wood floor cleaner. You may get them from home improvement shops in your area or check them out online.

The procedure for cleaning is easy. Begin by diluting the wood floor cleaner with water. Then soak the hardwood mop in the mixture and drain off any extra water. When you run the mop over the floor, try to follow the path of the wood’s grains. To prevent missing any areas, consider working in portions. Finally, let the floor dry completely before stepping on it.

Avoid Wearing Shoes When Walking On The Floors

Your footwear has the potential to scratch your hardwood floors, which could cause the wearing and tearing of your floors over time. Thus, try to be careful when wearing spikes or footwear with heels as they may cause damage to your hardwood floors.

But even if you walk on them barefoot, the oil from your feet may cause the floor to deteriorate over time. Hence, the best thing to do is to walk on your hardwood floors wearing socks only.

Attach Felt Pads On Furniture

Furniture such as tables and chairs could leave scuffs on your hardwood flooring, so consider attaching felt pads on their legs to prevent scratching. You may also do the same with your beds, sofas, ottomans, recliners, and stools.

Trim Your Pets’ Nails

If you have pets running around your house, check their nails to see if they’re long enough to produce a scratch on your flooring. Some cats and dogs tend to scratch on any surface, including floors. And if you have hardwood flooring, you may need to clip your pets’ nails to prevent them from damaging it.

Furthermore, dogs may accumulate dirt and grit between their paws. So be sure to wipe their feet before letting them in to avoid leaving paw prints on your flooring.

Protect The Floors From Direct Sunlight

The ultraviolet (UV) light in daylight has the potential to do major damage to your wooden flooring. Prolonged exposure to UV light may cause it to distort and fade over time. Thus, consider installing window coverings such as drapes and blinds and placing a carpet on your flooring to shield it from direct exposure to sun rays.

Refinish The Floors

If it has been three to five years since you installed your hardwood floors, you may opt to refinish them. A brand-new coat may restore the brilliance that must have faded through time. The wood stain you use may also serve as a protective layer, preventing scratches and fading on your floor.

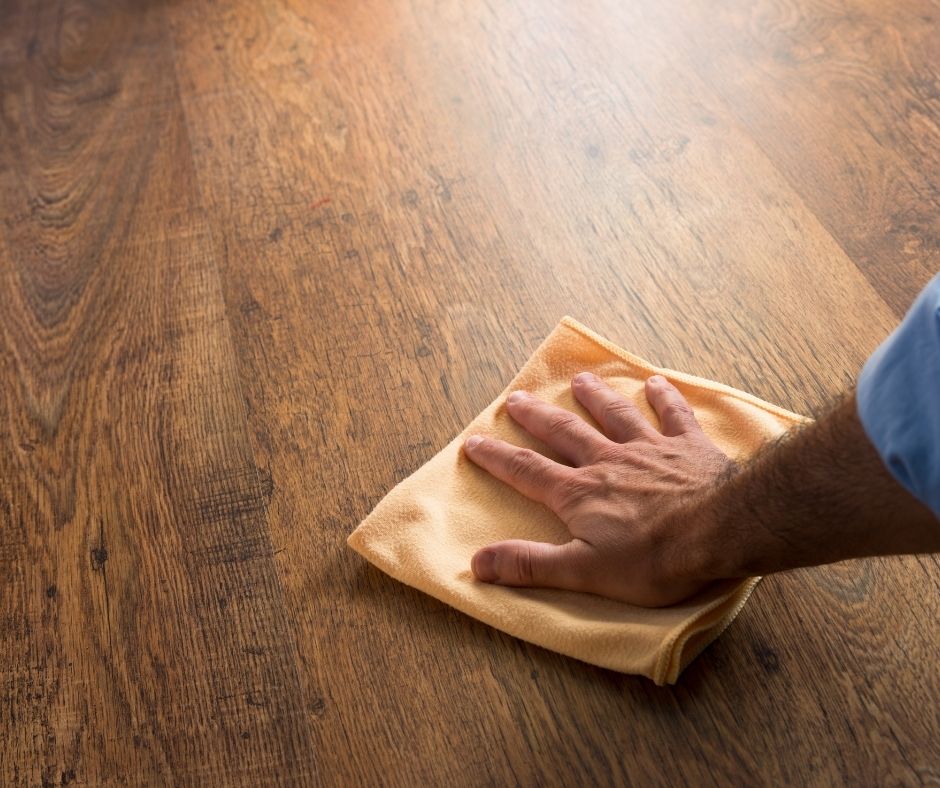
man's hand polishing hardwood floors

However, for low-traffic areas of your home, such as guestrooms or dining areas, refinishing may be done only every five to six years, depending entirely on how drab they look.

Final Thoughts

Wooden floors are known to be durable and appealing. However, in order for them to last long, you must know how to properly clean and maintain them. 

So do regular sweeping, dusting, and mopping of your floors using tools appropriate for the hardwood material. It’s also important to avoid causing damage to your flooring, such as scratches from footwear, furniture legs, or pet nails.

Protecting your flooring from sunlight is also crucial, as well as refinishing it to restore its brilliance. After all, the timeless and warm aesthetic that hardwood floors provide is worth any additional expense and maintenance.

Friday, June 4, 2021

How House Plans have Changed in the last 30 Years

House plans have changed a lot in the last couple of decades – and I’m not just talking about interior decorating or design trends (does anybody else remember the era of wallpaper borders, or life before media rooms?!).

As technology has improved, so too have our options when it comes to designing or building our dream home.

Back in the early 90’s, my husband and I bought a block of land and were excited to begin building the house where we hoped to start a family.

Working with our chosen builder, we were able to incorporate quite a few of the design ideas that we’d set our hearts on – such as a convenient hanging rail in the laundry, and even a safe in the floor of our walk-in wardrobe.

But there was one design feature which we were actively discouraged from including: a kitchen sink that overlooked the family room, in the middle of the house – after all, it’s true that the kitchen is the hub of the home!

Floor Plans Limited by Plumbing Options

At the time, kitchens tended to have the sink against an exterior wall, under a window.

Apparently, a sink on an island bench wasn’t a practical design feature, because the plumbing and drainage would have to be installed under the slab – making it virtually inaccessible should anything ever go wrong.

Being young and headstrong, we went ahead with our plans and were very fortunate that no plumbing work or repairs were ever required during the twelve years that we lived there. A blockage or broken pipe would likely have meant ripping up the slab, creating major mess, expense, and disruption inside our home.

The Kitchen is Now the Heart of the Home Physically as Well

Plumbing and drainage technology has obviously come a very long way since then, when you consider how many modern homes now feature a kitchen with the sink in an island bench!

Not only are there now such things as CCTV pipe inspections, which provide an easy way to remotely view those underground plumbing systems and diagnose any blockages or damage, but there is also equipment like jet rodding machines that can be used to clear the problems.

Perhaps the greatest advance of all is a method called pipe resleeving, which allows broken or damaged pipes to be repaired without major excavation works.

Pipe resleeving involves using one access point to instal a sleeve – a bit like a deflated balloon, or a stent that might be used in heart surgery – which is then expanded to seal the pipe and cures in place, providing a permanent repair. And all without the need to dig!

So any little niggles of guilt we might have felt about leaving the present day owners of that house with a potential plumbing disaster, have now been assuaged knowing that today there are simple solutions available.

If only it was so easy to get rid of those floral wallpaper borders!

Janet Camilleri loves writing for the web. In addition to her work in content marketing, she also blogs at Janetti Spaghetti. No matter what she writes, or who she is writing for, Janet aims to amuse, inspire or inform – and sometimes, all three!

Wednesday, January 20, 2021

What Is Reverse Osmosis Water Purification

Reverse osmosis water purification is one of the best methods of water purification available for residential homes today, although it was initially developed for industrial use. It’s a highly effective technique, especially if you’re trying to filter larger quantities of water. This mode of water of purification is typically used to reduce the amount of toxins and chemicals found in unfiltered water.

Despite the popularity that it has gained over the past few years, not everyone understands what reverse osmosis really is and how it works. This article aims to cover all the important details regarding this water purification technique and why it has become the go-to method in many households.

What Is Reverse Osmosis?

Reverse osmosis, basically, gets rid of water contaminants by pressurizing the water through a semipermeable membrane. The water comes out on the other end with less concentration of the contaminants.

This clean content fetched for domestic use is called the permeate, while the “wastewater” left on the concentrated side is called the brine.

You might be wondering what a semipermeable membrane is. Well, this is a small-pored material fitted in certain water filters like this one from Filtap. It blocks the large particles and allows the water molecules.

Normally, in osmosis, the water increases in concentration to maintain equilibrium on both ends of the membrane. However, with reverse osmosis, the contaminants are blocked from going to the other end, hence ensuring that only fresh water is fetched.

How Does A Reverse Osmosis System Work?

A reverse osmosis system mainly comprises of membranes, chambers, and cartridges. The membranes are made of synthetic plastics or other materials and are installed within a column or other structure in the drain or the supply line.

What Is Reverse Osmosis Water Purification? Domesblissity.com

The membranes and chambers are then filled with a granular activated carbon (GAC) that attracts and traps the organic and inorganic substances on its surface. The smaller molecules like ions are easily trapped and flushed out while the larger ones like minerals and metals are left behind.

Most GACs have a core that contains a combination of resins and chemicals that can remove odors and prevent further contamination. However, there are also some synthetic resins that don’t require chemicals and can perform just as well.

Most water filtration systems like under sink filters employ this mode of purification because it’s not only fast, but also quite efficient given the components put in place.

So, now that you know the parts involved, how does this system work?

  1. The first stage is usually the removal of the largest particles contained in the water. At this point, carbon and sediment filters are put into use, and they’re tasked with the removal of sediments and chlorine particles. Failure to get rid of the latter may lead to membrane clogging, which can significantly derail the operation of your system.
  2. The next step is filtration through the reverse osmosis (RO) membrane, where microscopic particles are separated with water. The clean or fresh water is then fetched on the other side of the membrane after the purification process is done.

    It’s, however, always recommended that you include a postfilter, especially if you want drinking water. This ensures that any microorganisms that might get into your water during storage don’t pose any health risks on the users.

Conclusion

Reverse osmosis is one of the most popular water filtration methods used in households today.  This system involves a carbon filter, sediment filter, and the main membrane.

The latter are designed to only filter big particles. Once they get to the membrane, tiny particles including any microorganisms are filtered. Of course, it’s worth noting that this system uses pressure to ensure that all parts are working as desired.

Thursday, January 7, 2021

5 Tips To Help You Keep Out Rodent This Spring Season

Here are 5 tips to help you keep out rodent this Spring season. Rodents, and especially rats, are closely linked to human beings. The reason behind this is that people and their dwellings give them the things they need most to thrive. However, if you have a rodent infestation in your house, it’s not impossible to keep them out this spring season.

A great strategy to keep pests out of your home is to visit this website for mouse control and let the professionals do the job for you. However, if you don’t have the budget to hire pest control specialists or you’d like to go about it in a less cruel manner, you should consider a DIY approach.

The following tips should help you on your way to a rodent-free home.

1. Clean Your Countertops And Floors

Casual housekeeping, particularly in the kitchen, often leaves food scraps or spilled crumbs left over on the countertops or floors, which serve as an invitation to various rodents.

To avoid this, make sure that you have a sweeper to capture the crumbs, and don’t leave any uneaten bowls of pet food in the dishes either. If you have pet birds, sweep away any seeds that have fallen on the floor.

2. Don’t Feed The Rodents

All common types of rodents are resourceful, and they’ll almost always find things to eat around your property, so you need to be diligent when dealing with them.

Whenever possible, pick produce from your trees and garden as it ripens. Then, compost vegetables and fruits that fall to the ground. During the day, feed any outdoor pets and never leave the leftover food lying around.

It would also be best if you didn’t store pet food outside without ensuring that it’s secure in rodent-proof containers.

3. Block Every Entry Point to Keep Out Rodent

One of the most crucial preventative measures you can take to keep the rodents out this spring season is to inspect your house’s walls and foundation to ensure that every entry point is blocked.

Rodents may enter sneakily by squeezing their way through the smallest cracks, so block the foundation cracks with masonry repair materials, and inspect the joints around the door sills and windows for cracks that could allow rodents entry to your home.

Some pest control service providers would recommend that you check your attic as well, since most rodents enjoy the warmth of insulation.

However, take note that there’s no fully effective rodent-proof insulation on the market as of now, unless you decide to utilize spray foam insulation, which could keep the rodents at bay, but may not be your desired choice of insulation.

4. Set Baits And Live Traps

This could be a diagnostic measure throughout the year. Depending on your preferences, you can either set some bait stations or live traps indoors, but the non-lethal option is heavily recommended.

Live traps are a poison-free and humane way to release and trap rodents while also alerting you as to where they’re finding entry into your home.

On the other hand, bait stations cruelly leave poisonous pellets for the rodents to eat, which makes them seek water outdoors; typically, they follow this thirst and die outside.

5. Try Using Holistic Repellents

Even if it’s a preventative measure, adding holistic and safe repellents around the outside and inside of your house could give you benefit you greatly if you’re struggling to keep out rodent this Spring season.

A good repellent you can use is peppermint oil, which irritates the rodents’ nasal passages because of the strong menthol odor. If you don’t like the peppermint smell inside your home, you can spray a small amount of clove essential oil to achieve the same effect.

So, if pests like rodents don’t stop bugging you, try growing some peppermint leaves around your home’s perimeter or spraying essential oils around your house to deter their entry. This will likely work, but if not, invest in some live traps and your problems will be gone in no time.

Conclusion

Rodents are one of the most frustrating household pests. They cause destruction to your house and may contaminate your food. So, make sure to follow the tips above if you want to keep them out this spring season. Rodents may need a place to keep warm and get some food too, but nobody said it had to be in your home.

Tuesday, January 5, 2021

What Are Carbon Brushes Used For?

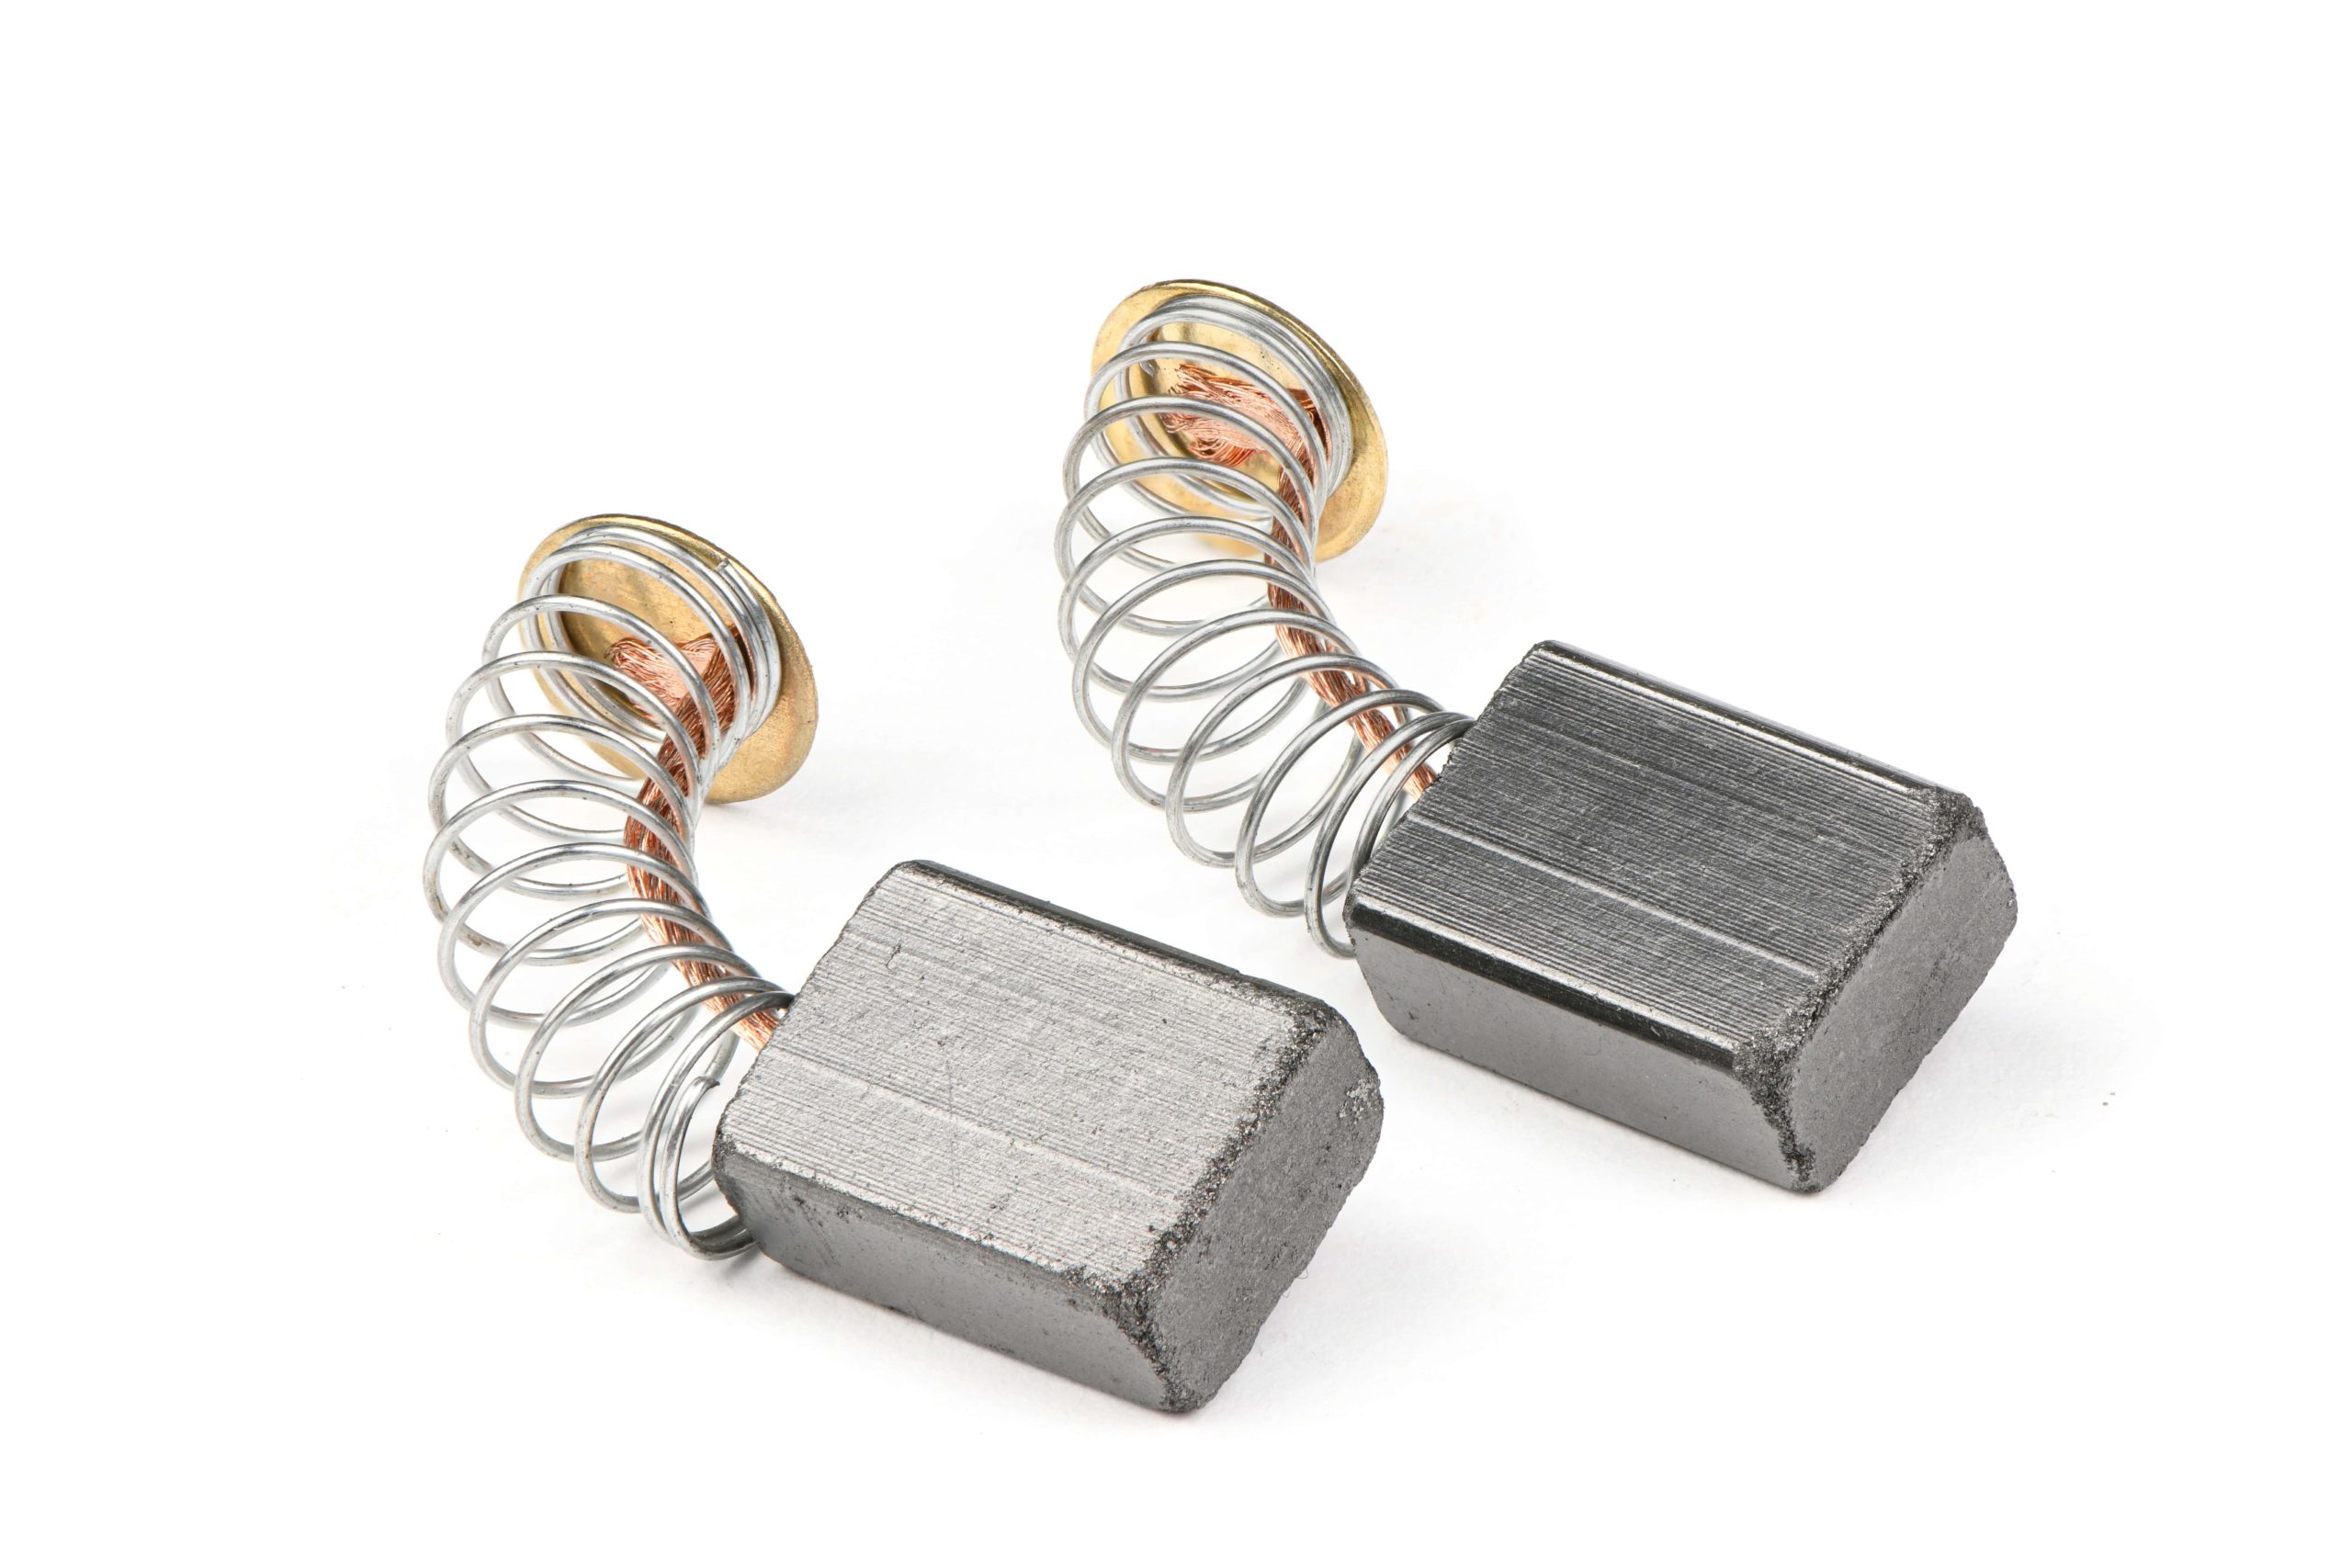
You’ve probably heard of the term carbon brushes if you’re working with electric motors. A carbon brush is a square of carbon that carries current through electric motors, which means that without it, an electric motor won’t work. Carbon brushes are made of wire and other additives. Here’s a short guide on the kinds and uses of carbon brushes.

Kinds of Carbon Brushes

There are four main categories of carbon brushes, which include metal graphite, graphite, electro graphite, and carbon graphite:

  • Graphite. These brushes are created by combining either natural or artificial graphite with resin or pitch. Usually, these brushes are used in commutators and slip rings. They are great for use in contaminated environments due to their high densities and porous qualities.
  • Electrographic. This type of carbon brush is known for its longevity and use for commutators. This type of brush is created in high temperatures and treated with organic or inorganic material to improve durability. Additionally, this kind of carbon brush is excellent for use in various operating environments, especially at high environments. You can also learn more about electrographic carbon brushes uses on sites like didyouknowhomes.com.
  • Metal Graphite. These brushes are made by adding fine metal powders such as tin, lead, copper, and silver to graphite. These are usually used in forklift truck motors, battery chargers, plating generators, DC machines, or plating generator. Its low resistivity makes it a versatile carbon brush with different uses.
  • Carbon Graphite. This kind of brush is ideal for use on older and slower machines with speeds of, at most, 4000 ft per minute. Graphite brushes are usually used in metal contacts and bases and aren’t used in commutators because of the high friction they produce.

Shops like Topdealsonline.shop sell carbon brushes, if you’re looking for a replacement or you are keen on getting one.

Uses of Carbon Brushes

They are used by connecting them to the moving parts of a device as these provide electric current. Aside from being commonly used in motors, generators, and alternators, here are some other uses:

  • Household Applications. Carbon brushes are part of common items you have at home such as power tools that you frequently use for home repairs, gardening, and office equipment. They are used in washing and drying machines, vacuum cleaner turbines, and hair dryers. However, household appliances use smaller carbon brushes compared with industrial and automotive applications. For their small dimensions, a carbon brush is usually placed inside the battery-operated motors that are created to transmit power silently.
  • Automotive Applications. Cars often use them for starters, alternators, and DC motors. Those required for automotive applications are used to provide current to the wire coils in alternators, which work by converting mechanical energy into electrical energy. Motorcycles, trucks, and passenger vehicles use alternators. There are also types specifically used in steering wheels or in contacts for airbags. Carbon brushes are also used in powering trolleybuses, battery-driven cars, or cable cars. Forklift trucks and cranes also use carbon brushes. Brushes for industrial uses are created to endure extreme temperatures.
  • Industrial Applications. The industrial applications include using these on commutator machines, including on traction motors, AC and DC motors, windmills, slip ring rotors, turbo-generators, hydropower stations, and cement mills.

Final Thoughts

Carbon brushes are used for various applications to transmit electricity to the moving parts of a device or machine. Applications range from household to industrial uses. Because of their contact with moving parts, they are more prone to wear and tear due to friction. Thus, if you need replacements, ensure that you find one of high quality.

Sunday, December 13, 2020

How To Repair Your Roof On A Budget

Roof repairs can be costly depending on the type of repair work required. In some cases, a roof may have caved in meaning the whole surface needs to be repaired. Such damage may be more costly than repairing holes that cause leaks in the house. Regardless of the type of repair that is needed, a budget needs to be outlined to avoid financial struggles after the repairs.

How To Repair Your Roof On A Budget Domesblissity.com

Here are some ways to repair your roof on a budget.

1. Hire A Professional

When you’re on a budget, you can’t afford to spend more than you need to. However, if you don’t have any previous experience in roof repairs, it’s easy to misjudge the type and amount of material needed. Hiring professionals to repair your roof helps you avoid such costly oversight and mistakes.

Professionals will accurately take down your roof dimensions so they can better gauge the amount of material required. They’ll then use this information to calculate how much you need to set aside for the material.

They’ll also provide a quote on the overall cost of the project based on the initial analysis of the repair process so you can be able to work with a figure in mind. Their careful planning will help you stick to your budget

Hire a roof leak repair Vancouver company that’ll work efficiently to save you time and money. They’ll have safety measures in place to prevent damage as such repairs run the risk of affecting other parts of your house.

Repair professionals are trained, experienced, and skilled experts. Left to your discretion, you may accidentally destroy your ceiling in an attempt to fix your roof.

2. Research

Once the professionals have handed you the material list required, you can either ask them to supply it for you or you can purchase them yourself. Remember, however, that roofers typically get huge discounts from manufacturers on account of the work they do.

If you still think you’ll be able to save money by doing it on your own, do some comparison shopping first. You might also not find all the materials you need in one store.

For example, one hardware may be selling roof sheets or tiles at half the price of another. Another store may be pushing a clearance sale. Knowing such information will help you know when and where to shop.

You should also set aside time to compare materials in different stores and assess their quality. As much as you want to save money, you can’t afford to compromise on quality. Going for cheap quality materials won’t do your roof any good and may end up costing you more in the long run. 

3. Prepare For The Unseen

You need to have some room for unexpected costs in your budget. For example, it may become apparent after repair work has started that your plywood under the roof is rotten because of exposure to rain. It’s good to have enough money in your budget so you can easily address unforeseen circumstances like this.

Another example of an unforeseen scenario is if the professionals identify a potential risk to your roof such as a dangerous tree. They’re trained to have an eye out for factors that may cause damage down the road. In this case, you need to have enough room in your budget to get the tree branch trimmed or removed.

4. Temporary Repairs

If your roof needs immediate attention but you aren’t quite ready financially, you can consider carrying out temporary repairs. If you consult a professional roofing company, they can provide temporary options depending on the damages.

For example, if your roof is leaking, roof repair experts may recommend different types of roof stoppers or shields until you can organize your finances for more permanent solutions.

When in such a situation, you may be tempted to temporarily fix the roof yourself. However, you may run a risk of using material that may further damage your roof or is unsafe. This can lead to further damage which will be more costly than the initial problem.

5. Take Your Time

As repairs are being done, you may decide that you want a brand-new roof or for the professionals to fix the parts which weren’t part of their quote at the time.

If you’re on a budget, you can take your time. Make sure that the problematics areas are attended to first for your safety, then you can continue to revamp the roof over time.

Conclusion

Repairing your roof on a budget requires preparation. Hire professional roofers who will save you money because of their expert knowledge and skill. You’ll also need to do some research regarding when and where to buy.

Temporary repairs are also an option while you gather the finances required for a permanent repair job. You should also make space in your budget for unforeseen circumstances during the project. Remember to take your time when repairing your roof to make sure that you’re not spending excessively.