

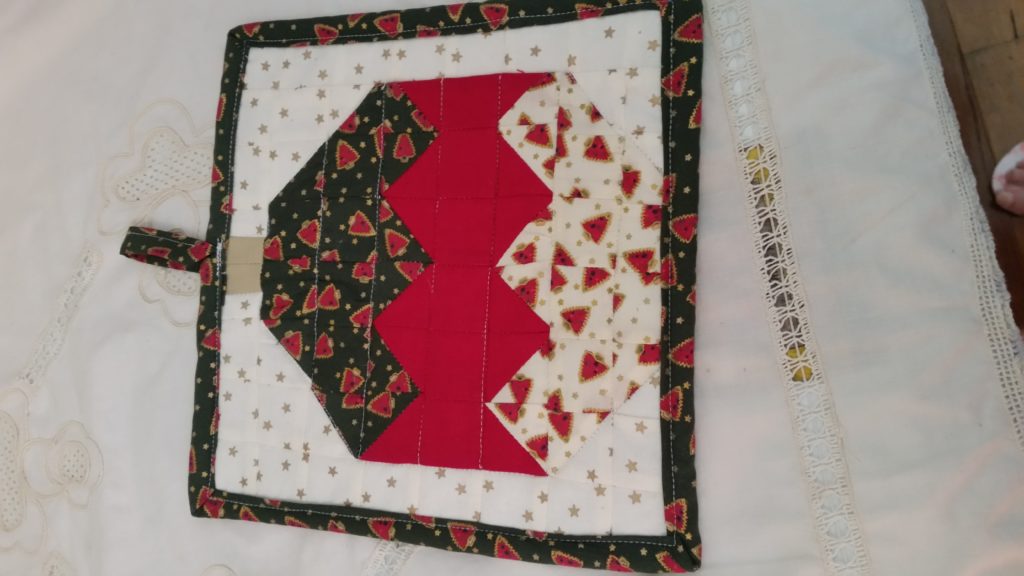
I’ve never been one much for creative sewing rather one that sews for purpose like decorating, mending or clothes. When a dear friend asked me if I’d like to join in on a Christmas Kitchen Swap I said “I’m in!” I have been involved in a few sweet pouch swaps over the years where I’d sew a zippered pouch and fill it with sweets and little bits and pieces and post it off to a secret swap partner and they’d send me one. A perfect little sewing project and one that I could master. This Christmas Kitchen swap involved quilting, something I’m not too experienced at but I gave it a red hot go with this quilted Christmas Bauble Pot Holder.

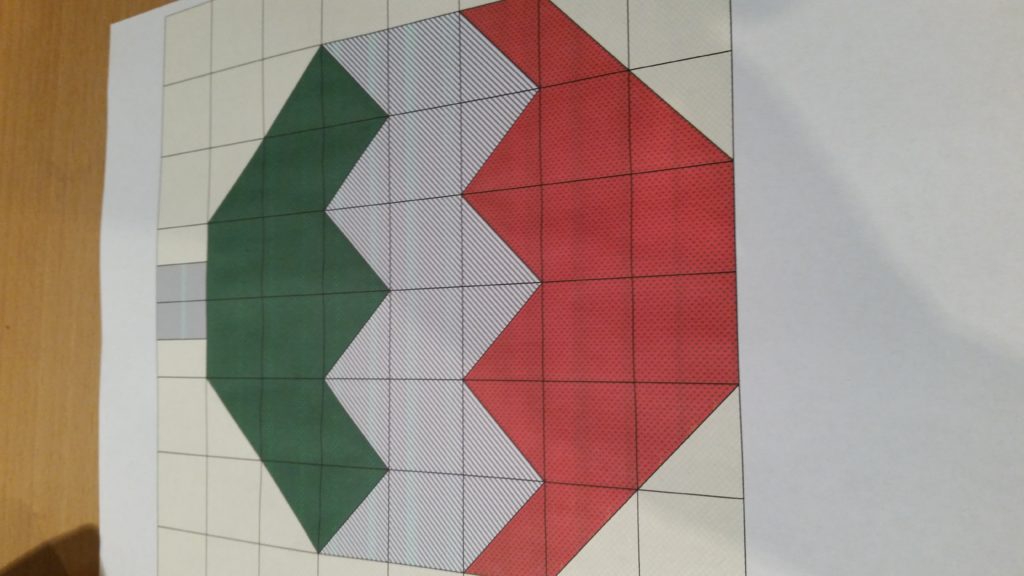
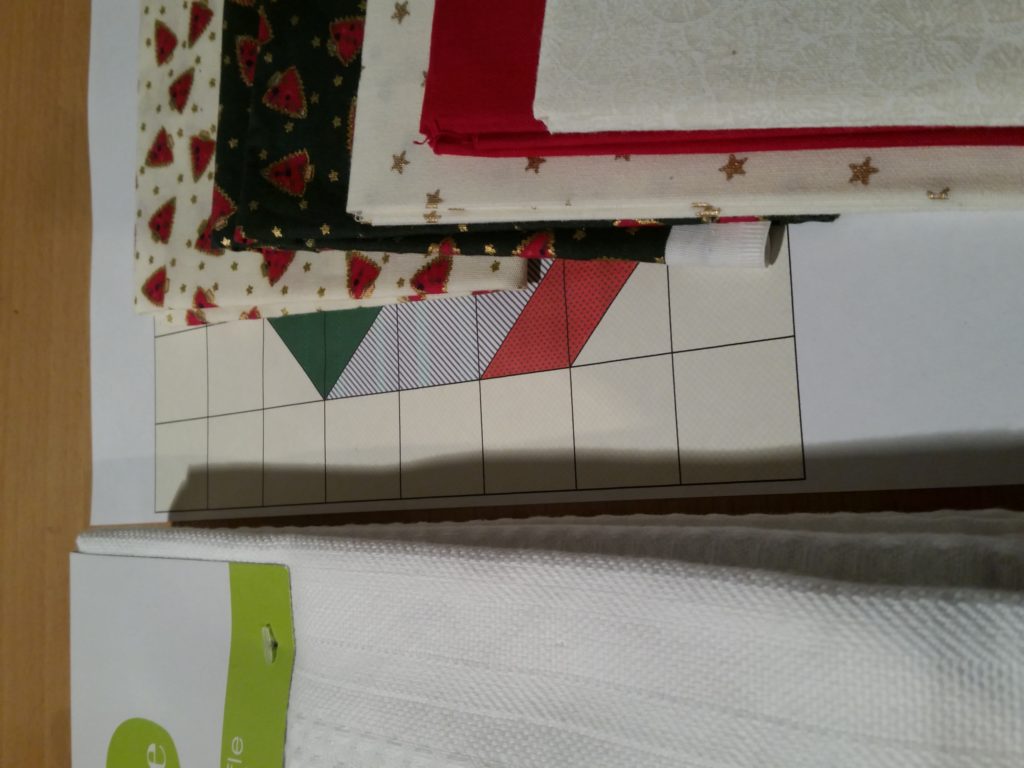
I had an idea to make a Christmas bauble pattern but I searched and searched online for a pattern but couldn’t find one so decided to make one myself. I’m pretty good with Microsoft Word so I thought it would just be a matter of creating a table of equal squares and diagonally splitting the squares where I needed to and changing the fill properties which is what I did and it worked out great.
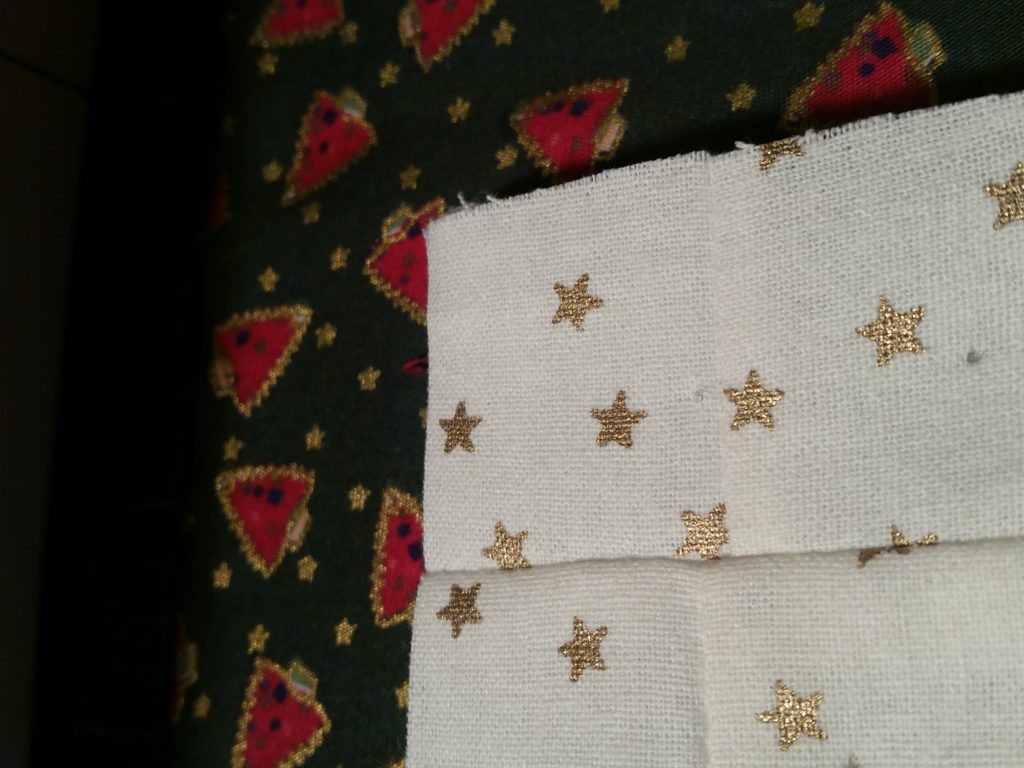
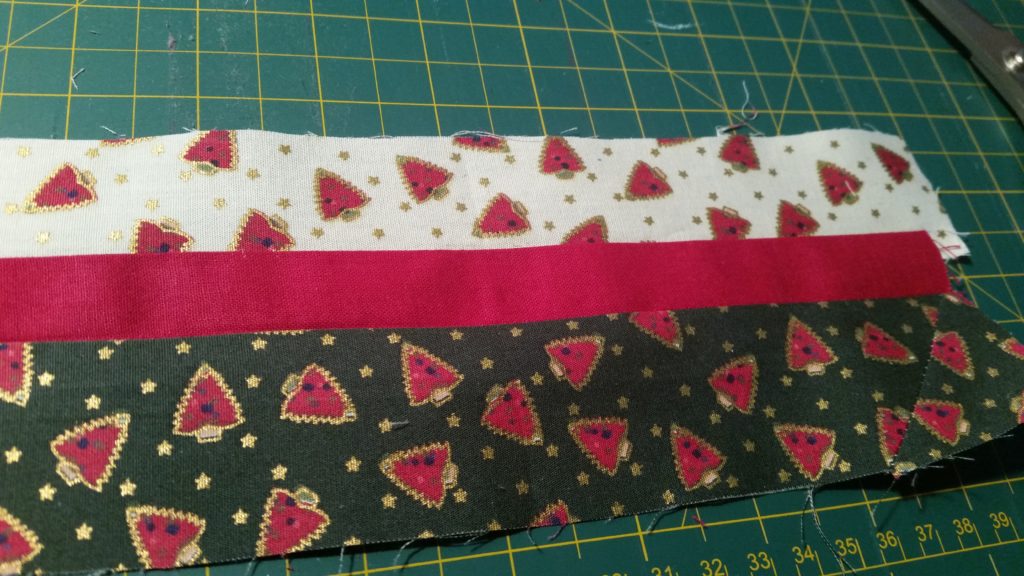
The next step was to choose the fabrics. My local fabric store had some really cute designs for Christmas so I grabbed a couple of fat quarters in matching designs and set about planning my colour scheme. The ‘red’ colour inside the Christmas tree on the printed fabric above is actually a dark pink which I thought was something a little different to the regular red and green you so often see on Christmas fabrics.
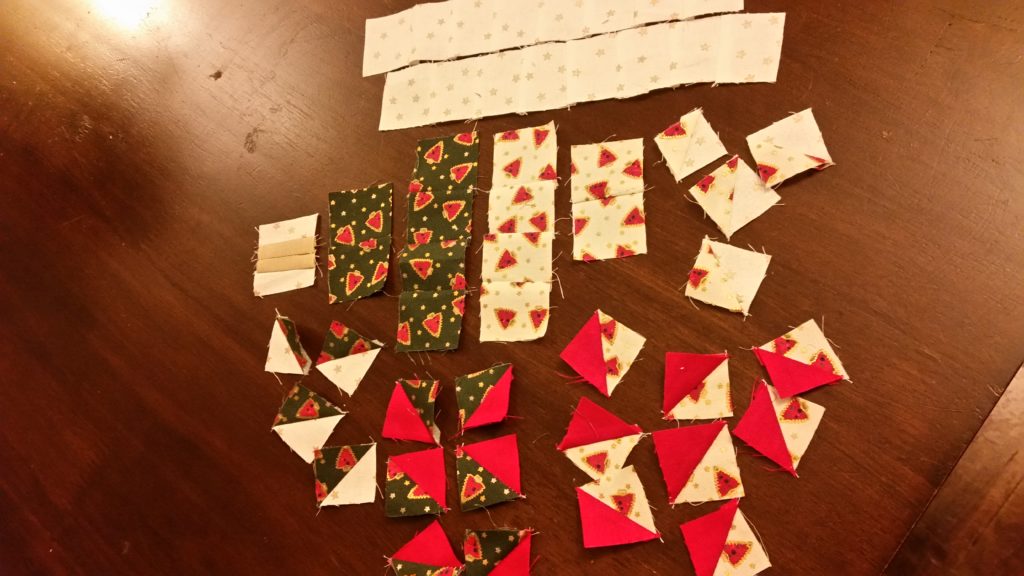
I’d never quilted something so intricate before so was a little out of my depth when I started. I kept telling myself how hard can this be and there were a few things I had to be mindful of when setting out. It’s really important to get the seam allowance correct or the squares won’t line up and when making half square triangles (HSTs) you have to start with a larger square.
Something I learned the hard way. As you can see in the photo above the triangles were way smaller than the 1″ squares. Back to the drawing cutting board. I found an excellent tutorial from Alyce at Blossom Heart Quilts who explained all about cutting HSTs which was a great help.
As you can see, what I sewed is a little different from the pattern I originally created but I’ve adjusted the pattern I’m sharing here today to reflect what I actually sewed. You can change it to however you like. As you can also see from my sewing above, lining up the squares wasn’t exactly perfect, which I put down to inconsistent seam allowances but being my first ever project like this, I was happy how it came together and will pay particular attention to that the next time I sew squares for quilting.
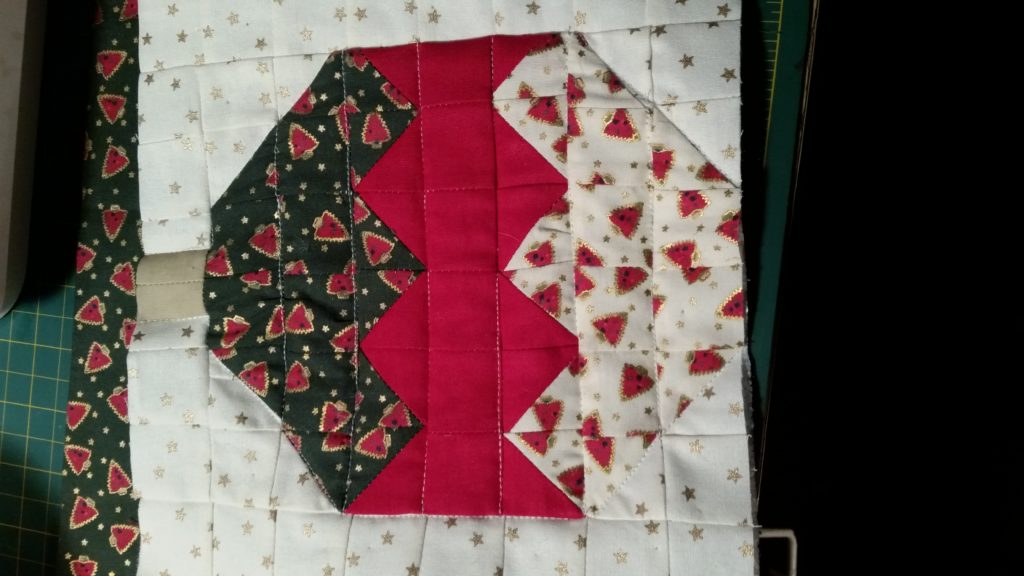
It was like putting a jigsaw puzzle together and I loved seeing the pattern come together although not completely perfect.
Once you’ve sewn your squares together to form the top layer of the pot holder, you’ll need to ‘square off’ the edges and cut a piece of heatproof insulation batting and a backing in a coordinating fabric. The finished pot holder should be approximately 9″ square once you add the binding.
Pin together securely and sew (or quilt) along the edge of the bauble pattern and along each row. You can do this however you like. Sew the edge of the bauble or you could sew straight horizontal or vertical lines. It’s entirely up to you. I chose the plain dark pink fabric for my backing.
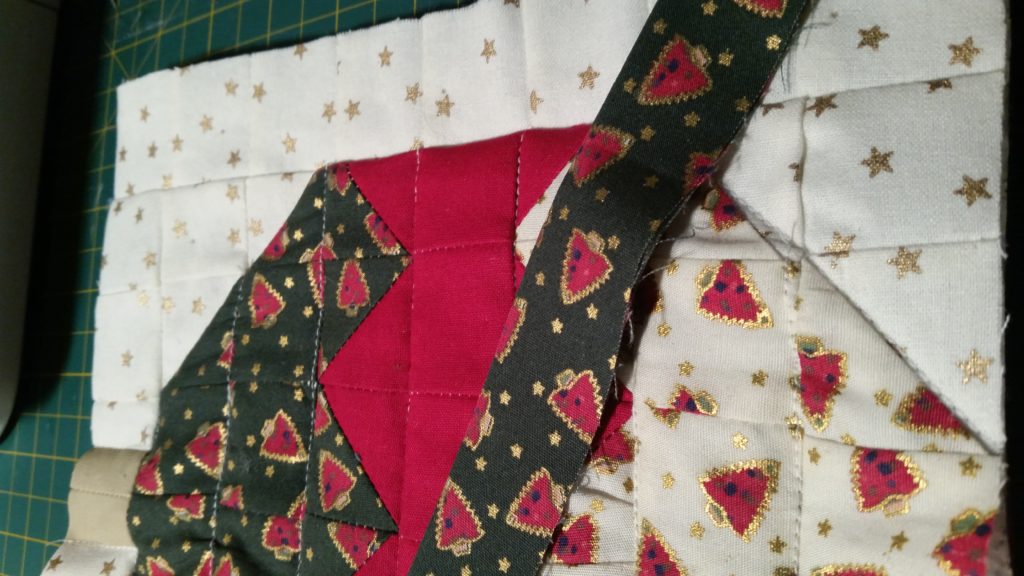
The next step is the binding. There is a fantastic tutorial here to sew the binding for a pot holder. I incorporated the ‘loop’ into the top centre of the pot holder but this tutorial explains it for the corner but you can adjust that to suit.
And that’s pretty much it. I used white thread throughout the entire project but you could change it to coordinate with your fabrics. Even if it’s not perfectly quilted, it’s still quite functional. My swap partner loved it so I guess that’s the main thing plus I got to have a got at mosaic quilting and found it a lot of fun.
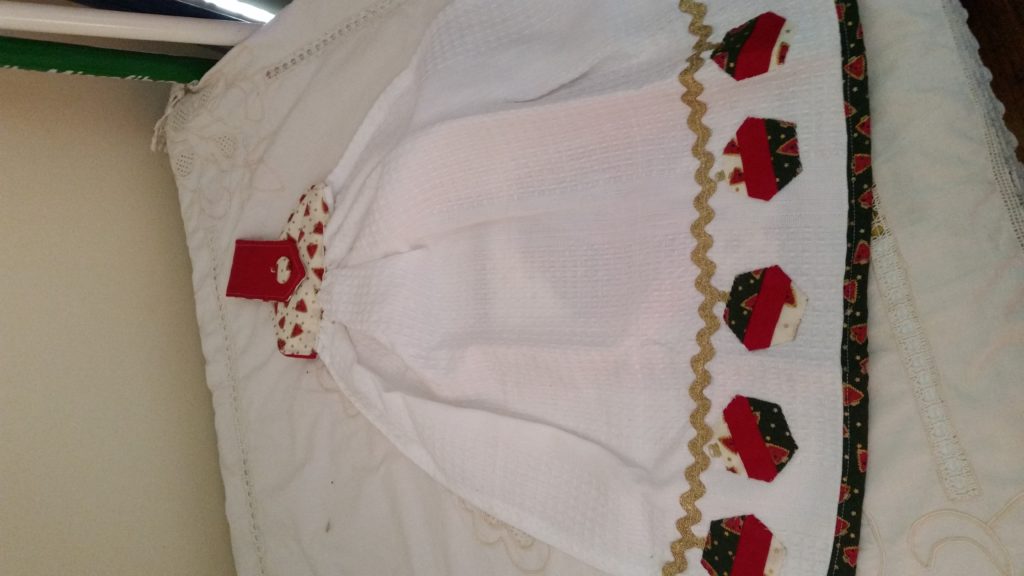
Part of the swap was also to create a tea towel which I did above using a store bought plain white tea towel (they were 3 for a couple of dollars) and I used the same fabrics I used in the pot holder.
I sewed three strips of the main patterned fabric together and cut hexies out of them to resemble baubles. Using gold thread, I hand embroidered the top of the bauble and gold bric brac braid along the top of the baubles. Using coordinating fabrics, I created the hanging part at the top of the tea towel and finished with a coordinated fabric button. There’s a fabulous tutorial and pattern here to create your own hanging tea towels.
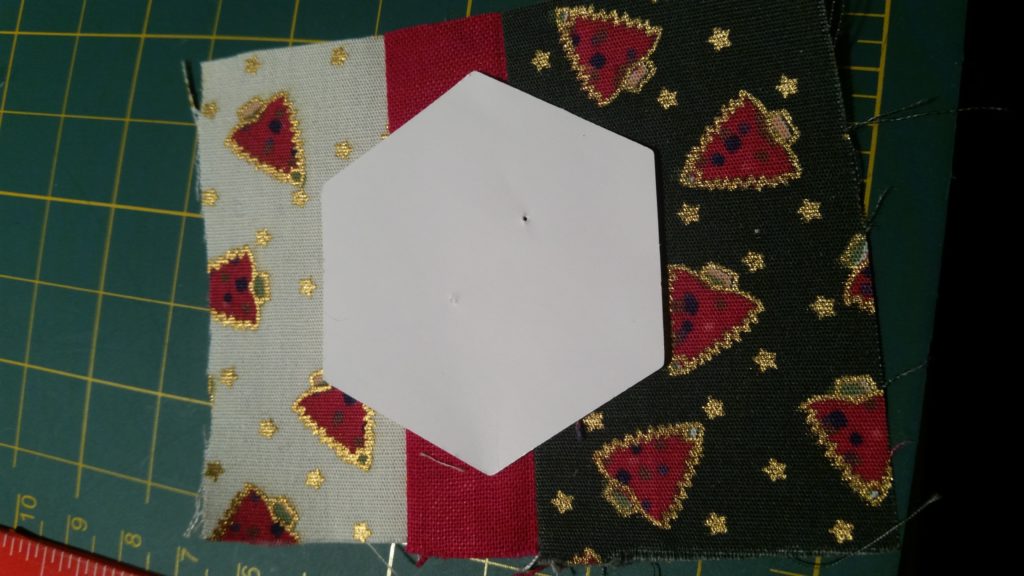
I loved these fabrics so much. There’s a bit left and think I might make a few more hexies to embellish gifts for the teachers this Christmas.
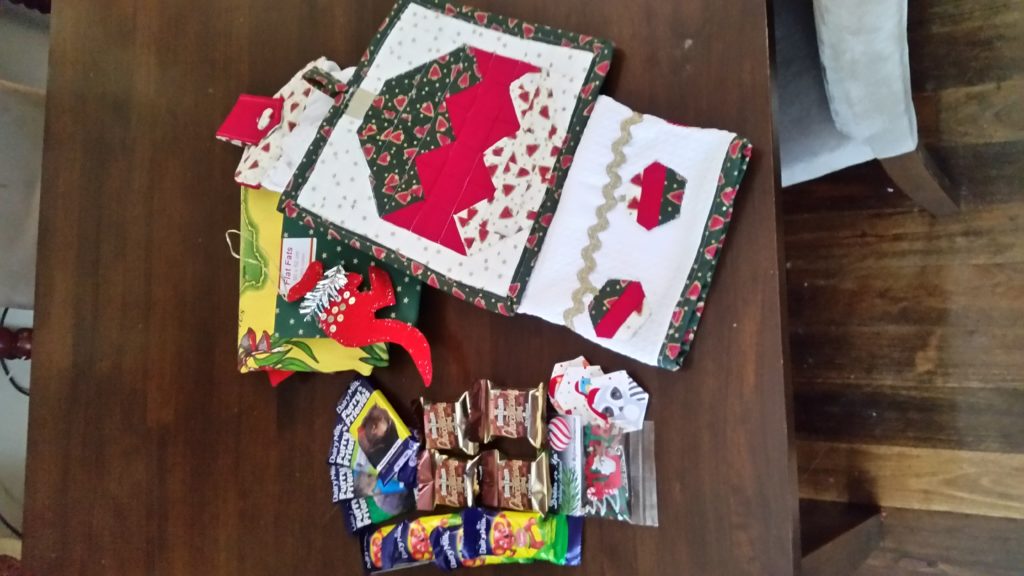
I sent off the pot holder, the tea towel, a vintage apron with the map of Australia on it (my swap partner was in Canada), a few Christmas hexies in another fabric I had, a stash of Australian chocolate, a simple kangaroo shaped felt hanging ornament and some Christmas buttons. My partner said she loved everything. It was such a fun swap to be involved in.
Christmas Bauble Pot Holder Pattern
If you’d like to have a go at making your own Christmas bauble pot holder, you can print the FREE pdf of the pattern.
What You’ll Need
- 24 x 1″ squares for outside bauble
- 8 x HST for outside bauble
- 2 x 1/2″ squares for outside bauble (top of bauble)
- 2 x 1/2″ squares for top of bauble
- 6 x 1″ squares for top half of bauble
- 10 x HST for top half of bauble
- 10 x HST for bottom half of bauble
- 6 x 1″ squares for bottom half of bauble
- 6 x 1″ squares for middle section of bauble
- 12 x HST for middle section of bauble
- approx 9″ square piece of coordinating fabric for back of pot holder
- approx 9″ square piece of thermal batting
- at least 40″ long x 2″ wide binding in coordinating fabric
- thread
How to Sew
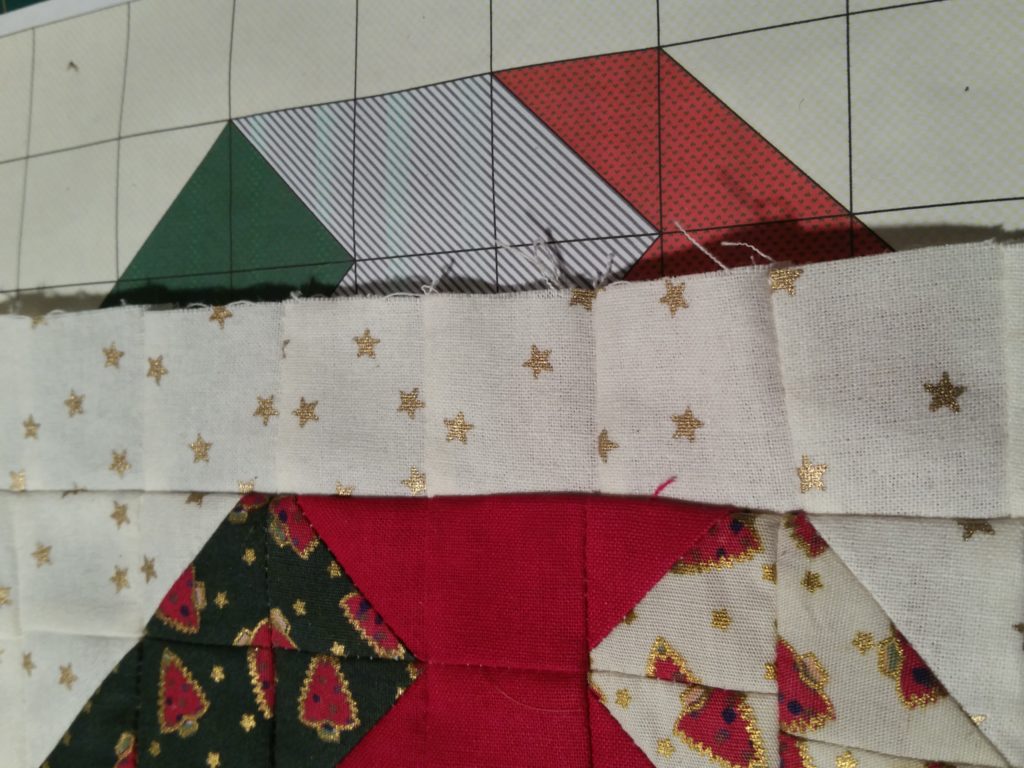
- After selecting your fabrics, begin to cut out squares according to the pattern.
- Following the pattern, sew together squares in strips (either horizontally or vertically) and when complete, sew together to form the front square of the pot holder.
- Remember to press seams as you go.
- Join together top of pot holder, thermal batting and back of pot holder.
- Securely pin together and trim outside edges.
- Quilt your desired pattern. You could quilt the edge of the bauble or straight vertical or horizontal lines.
- Sew binding to edge of pot holder incorporating a loop to hang the pot holder when finished.


Wow…this is so cute! 🙂
I would love for you to share this with my Facebook Group for recipes, crafts, tips, and tricks: https://www.facebook.com/groups/pluckyrecipescraftstips/
Thanks for joining Cooking and Crafting with J & J!
I love sewing that combines creativity with a practical purpose. Your pot holder is a nice little gift that certainly combines both 🙂 Good job! You did great!
Thank you so much Karen. I appreciate your kind words.
Anne xx